Knifesmith
1815
23
1

This is for the tanto that I posted a bit back:
https://imgur.com/a/yFJoB
This pic shows the blade wrapped in toilet paper and masking tape (to protect it), the snakewood for the saya, a basswood faux blade to fit into it (so I don't scratch the real blade), and a basswood insert (I'll explain it all in the upcoming pics).

Routing out a space in the snakewood on my drill press...
Yeah, I don't have a mill, or a real router, and carving snakewood with a chisel is a pain due to splintering out/how hard the wood is.

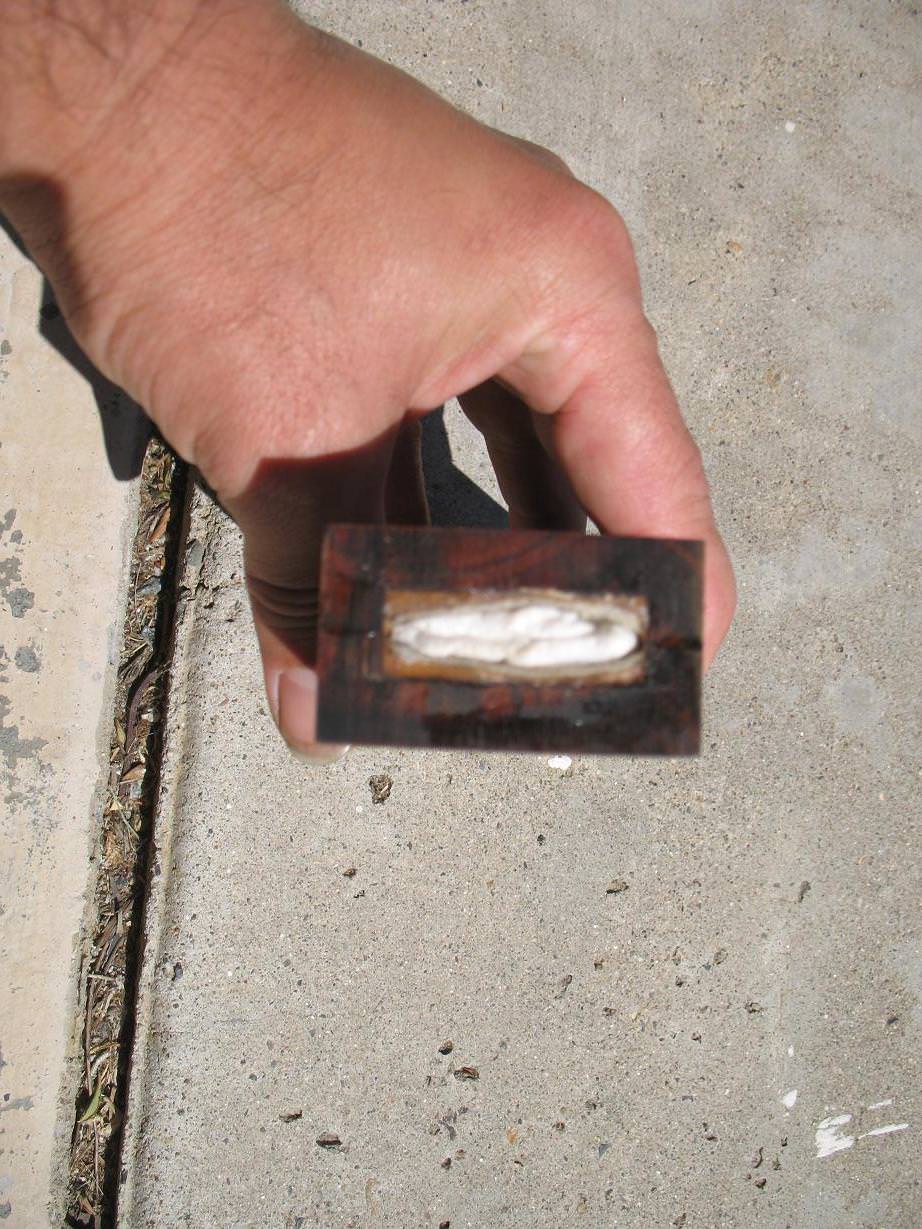
This is the aforementioned basswood insert fitted into the snakewood.
(and pay no attention to the massive mess that is my garage workshop)

Fancy epoxy mixing dish (inverted diet coke can), and epoxy in the snakewood pieces.
(seriously, pay no attention to the mess that is my workbench either...)

Clamping the pieces together with paper in between so nothing gets stuck that's not supposed to be.

And, overflow is why you use the paper...

Sanding everything flat-ish on the belt sander.

Finish flattening on the granite flattening plate.
Neat trick; you can do this with a spare sheet of glass as well. I use a thinned rubber cement on both the sandpaper sheet, and the granite block, as contact cement. Much easier than having everything sliding all about.

After getting everything perfectly flat, the ridge line for the blade is drawn in, and now it's time to carve carve carve. Basswood carves a lot easier than hardwoods, and so it's easier to put in a basswood insert into a milled block and then carve that, than it is to carve most hardwoods.

What will be the ridge line, and the basic outline carved in with a fine gouge.

slow and tedious carving in the bevels...

Making sure the blade has a little space in the carved out area. It's got to be carved a few mm oversized to fit additional inserts (upcoming pics).

And... super non-traditional, but yeah, skeepskin/shearling lining. I shave the shearling so there's only a very thin layer of fuzz left.

See where I'm going with this? A bit more epoxy under those shearling inserts, and we're ready to clamp again. The wood blade form has the same angles, but a way too thick profile, so the pieces of the wood saya won't touch when the inserts are being glued in. And the inserts get glued perfectly flat to the carved angles.

More clamping and waiting for epoxy to cure...

A mixture of beeswax and choji (clove oil). Clove oil is traditional for Japanese swords, but is really thin. Adding beeswax thickens it up, and keeps it where you want it. In this case, that's impregnating the thin layer of shearling fuzz. All in all this will make a nice soft lining that also keeps the polished blade from rusting.

More bloody epoxy...
Glued, and with a really fancy TP plug so no grit or dust gets inside onto the sticky oil/wax mix.

This saya has an african blackwood collar piece. I didn't want any metal in this, and didn't trust the strength of an oily hardwood to oily hardwood interface. So... these holes which should act as "epoxy rivets, increasing the surface area that the epoxy has to hold on, and eliminating all the strength of the epoxy being in a single plane.

Test fit... Perfect!

I didn't take pictures of sanding/shaping the outside, or of applying the finish because that stuff is a) even more boring than the rest of this stuff, and b) well, see point "a".
Anyway, this is what the finished piece looks like in it's sheath/saya.
As always, if anyone has any questions, post 'em here or message me.
And if you're in the So. Cal area, and want to smash some metal, I could use a striker for a new damascus project I'm working on. You'll get paid in "experience"... and tacos. Tacos to your heart's content!
CloakerJosh
Awesome, @OP.