joevsthevolcano
107294
1317
26
Obligatory final video at the beginning. I included it at the end as well. During quarantine, I decided to fulfill a bucket list item and build a Jurassic Park Jeep. I decided to do all the paint work, body work, and engine work...even though I had never done any of those before (I had some engine experience working on VW engines...but nothing like this). I found a suitable Jeep in Moose Lake Minnesota in July 2020 and took the plunge. My friend and I flew out to drive it home and begin a

Here I am with my brand new (to me) 1993 Jeep Wrangler Sahara...fresh out of Minnesota. The frame was rusty and the rear brake line fell apart on the drive. The soft top had holes and leaked and the seats were a little torn up. But the engine was solid and this was the correct year to start making my Jurassic Park Jeep. July 2020
This is the continuation of my original post here: https://imgur.com/gallery/DBqTj56

On the way back from Minnesota, we drove through South Dakota. There is a Corn Palace there...call it a love letter to corn. I have an app on my phone called Roadside America that has all these attractions that you can see while traveling. This was one that we just happen to pass by while we filled up with gas. Definitely a stop if you are passing through SD. If you zoom in, you can see that the walls are covered with corn husks. July 2020

On the way back from Minnesota, there was a screw in a tire that just got too hot. We ended up stuck in the middle of South Dakota for a day waiting for a tire place to open (it was a Sunday and they were closed). This was us trying to unscrew a locked lug nut. We later found the special lug nut socket in the glove box. July 2020

Here's a close-up of the flat tire. We were getting gas and noticed a screw in the tire. We knew the screw would heat up from friction and could cause a flat...but we journeyed on. The tire blew about 50 miles later right outside Murdo, South Dakota. July 2020

Safe and sound back home after a 4 day journey from Moose Lake, MN. I drove it like this for about a week before starting on the makeover. I made it home in time for my wife's birthday. This was taken a couple days after. July 2020

The upholstery and seats are out. And now I can get a view of the rust in the tub. For coming from Minnesota, there was surprisingly little rust. Just a few surface spots at the roll bars. Unfortunately, it was around this point that I realized the seat frames are attached with special riveted bolts that work fine...unless the nut under the tub is rusted...which they were. I had to go buy a grinder and grind off a couple seat bolts on the driver side. After doing that I discovered that driver side seat frames are very difficult to buy. I bought one and it ended up being for the passenger side. Eventually, I found a driver side seat frame, but I also had to re-weld the rusted nuts under the tub. August 2020

I taped most of the bolts that pertained to a piece together to make re-assembling the Jeep easier. I still have a box of bolts that I don't know where they go.

Okay, tires are off, vinyl pinstriping is off and I've sanded down some of the rust. Most of the interior and marker lights are out too. Now I need to tackle this front bumper.

The front chrome bumper was welded to the frame, so we had to cut it off. My son likes power tools, so he volunteered to grind off the remaining weld points. His work didn't really matter because we ended up just buying a new frame for the Jeep. But this was the first part of doing permanent changes to the Jeep...not just unbolting bolts. August 2020

Finally got the hood and front grill off. At this point, I had no idea what all the hoses and wires were under the hood. By the end of this project, I could tell you what each one does. I thought I was a few weeks away to finishing at this point...boy was I wrong! September 2020

Front fenders pulled off. The battery tray, fuse box and support bars all came off too. This was my first view of the suspension and engine. We used the Greendale flag in a family photo that we have hanging on the wall. #sixseasonsandamovie

Here's the number one reason why I bought a new frame. I broke so many bolts that had rusted or that had to be ground off. September 2020

And here's the grill and hood off. I was quite proud at this point as I had never taken a body panel off a vehicle before. I had grand plans for a quick wash and paint, but eventually I took everything to be sand blasted. After sand blasting, the parts all looked brand new and the new primer and paint adhered great to them. September 2020
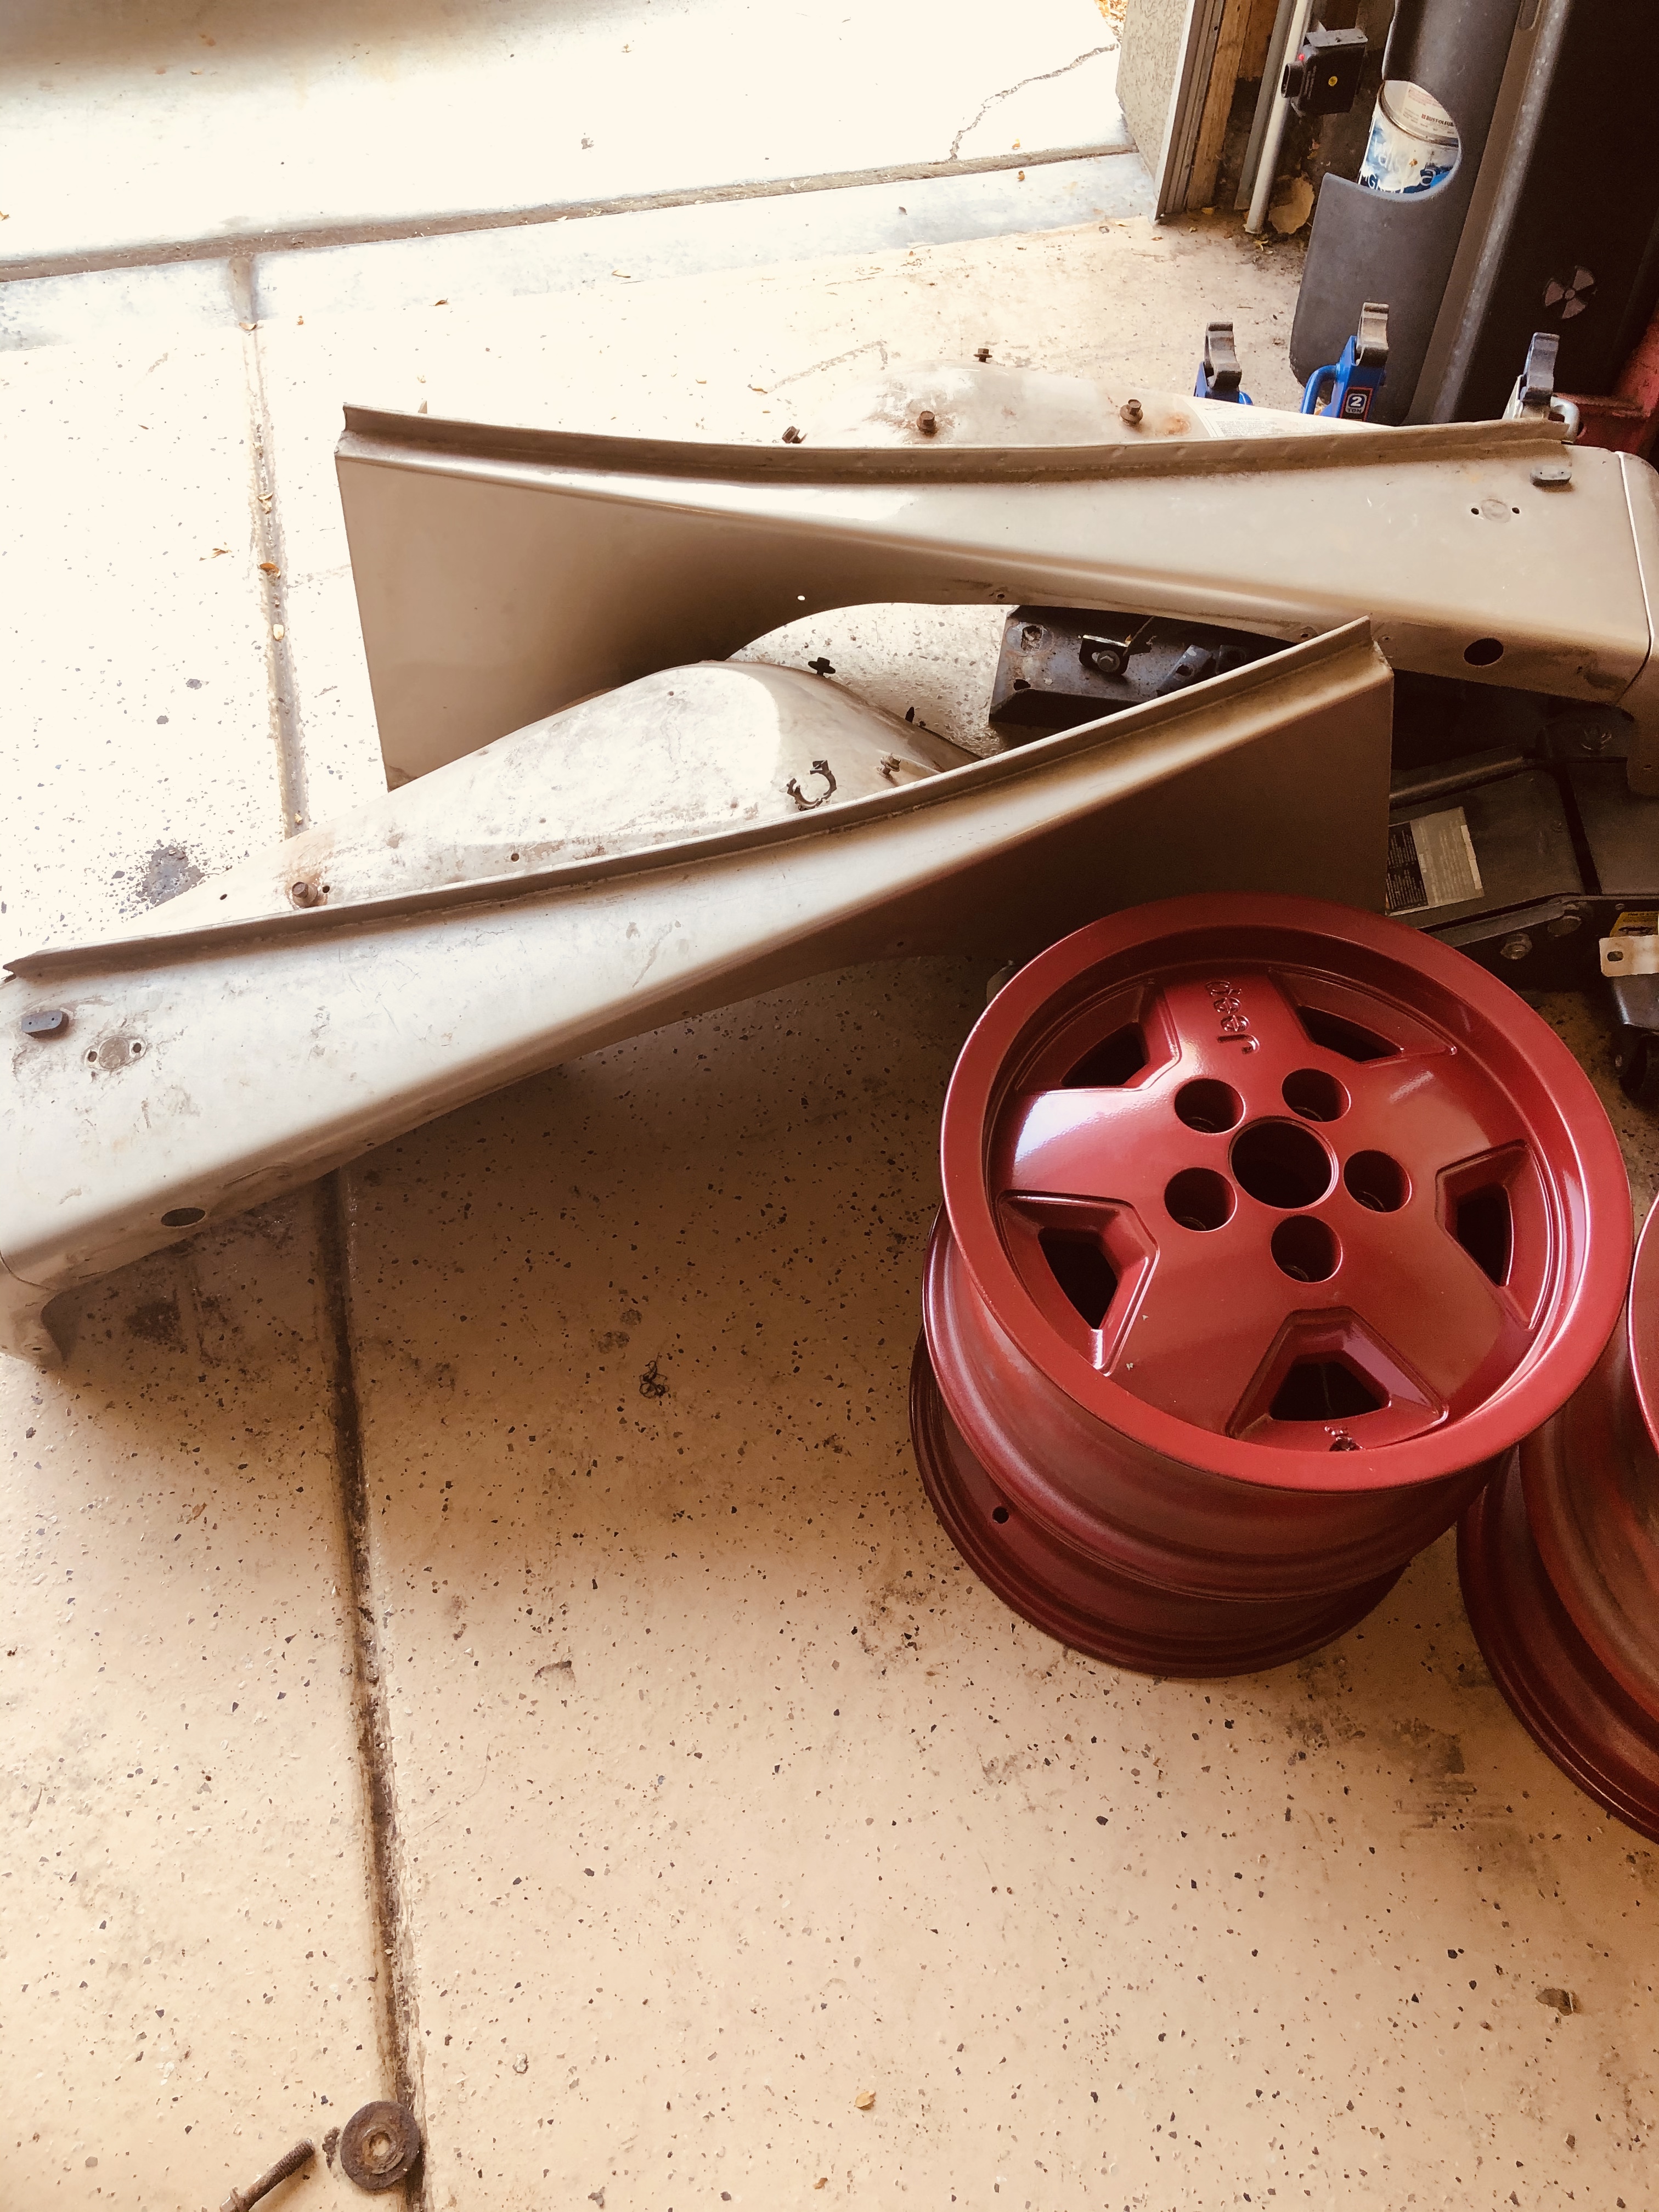
I found some rims on Facebook Marketplace for $100, so I was able to powder coat those quickly to give myself some inspiration. This right after removing the front fenders. September 2020

Look at that pile of parts. This pile would grow by quite a lot. You can see the blue and red angle grinders that I bought to remove a few bolts. Incidentally, the razor scooter in this picture is for another project that I was a working on in tandem with this one. The E100 Razor scooters have the exact size motor need to build a fully working R2D2 on a 3d printer. #mrbaddeley #r2d2

I separate the part piles into large parts and small parts. Mostly things that are bolted to the tub and things that are bolted to the frame. I eventually got rid of most of these parts (the center console, chrome bumper, battery, soft top, rim and tire). The plastic fender trims are specific to the Sahara trim, so those were kept. September 2020

These are the original seats. The Sahara trim (green fabric with tan leather) was only used for a couple years and are extremely difficult to find. You can find seats in this condition on eBay for around $600. I removed the seats and decided to spend the next year looking for better ones. I eventually found a pair in Wisconsin and had them shipped out to Utah. The only problem was the shipping company would only ship to Cheyenne, Wyoming. This was because it wasn't a standard shipping company (like UPS). It was a tool company called Fastenal. They ship parts to their warehouses and you can pay them to put a pallet of stuff on one of their trucks as it drives across the country. The issue was that they divided the country into the western and eastern sides and their trucks didn't cross the imaginary territory line. So I could ship anything from the eastern US as far west as Cheyenne, WY. It was extremely cheap to ship, so my wife and I just drove 6 hours to Cheyenne to pick up the seats. The "newer" seats I bought were from a 1990 Wrangler, so they are a little lighter (more of a grayish-green than a forest green), but they are immaculate and I really enjoy them.

Yeah, I got the tub off. there were a lot of words spoken trying to remove the tub bolts. This day I took a survey of the frame and axles and decided to look around for a new one because of the rust on this one. September 2020

Check out that stripped bolt! And all that rust scaling on the frame. This was the main reason why I decided to just get a new frame. The other reason was I could transfer parts to the new frame as I worked on them. September 2020

Here's the grill, fenders and windshield frame all back from sand blasting. The sand blasting leaves a nice bare metal feel, but you have to prime the parts quickly afterwards or they begin to rust (by quickly, I mean within a few months). Or you can just keep them dry indoors. Late September 2020

Here's the underside of the driver's seat. The large bolt on the right was ground off the old nut and the rest of the bolt was still rusted in the nut. I went online and discovered that the easiest thing was to just remove the bracket. It was spot welded to the tub, so I found a local welder and drove the tub to him on a trailer. It took him a couple days to remove the old bracket and spot weld on the new bracket. This little job delayed the project a month. Late October 2020

The tub is back from sand blasting. I originally drove the Jeep (without any interior) to the sand blaster and he recommended I continue taking it apart...otherwise sand would get into the engine. So I drove home and continued to remove parts until I had removed the tub from the frame. The tub is only connected with 6 large bolts, so it's not that hard to remove, but it is heavy and very difficult to drive around. I had to borrow a trailer from a friend numerous times to drive it to be welded, sand blasted, and returned home. You can see the old frame in the background. Late October 2020

Here is a great shot of priming the bar metal tub. It was winter and I had to put space heaters under the tub to warm the metal so the primer would have a better chance at adhering. This was November 2020 during the pandemic.

And here is the new frame I found. I had it sand blasted and powder coated. I found some new axles from a local junk yard and just used those. I finally got the front axle attached to the new frame after buying new leaf springs a couple times. I wanted to remove the 2" lift and go back to stock, but the only want to measure a lift kit is with all the weight of everything on the Jeep. So I was shooting in the dark buying leaf springs (i.e. asking a guy if they were stock and taking his word for it). After adding the front axle, adding the tires made it easier to move around (kinda like a wheelbarrow). January 2021

I had the gas cover and transmission skid plate powder coated the same color as the rims (which looking back was a shade too dark). But it really made the new frame look so much cleaner than the rusty old frame on the left. February 2021
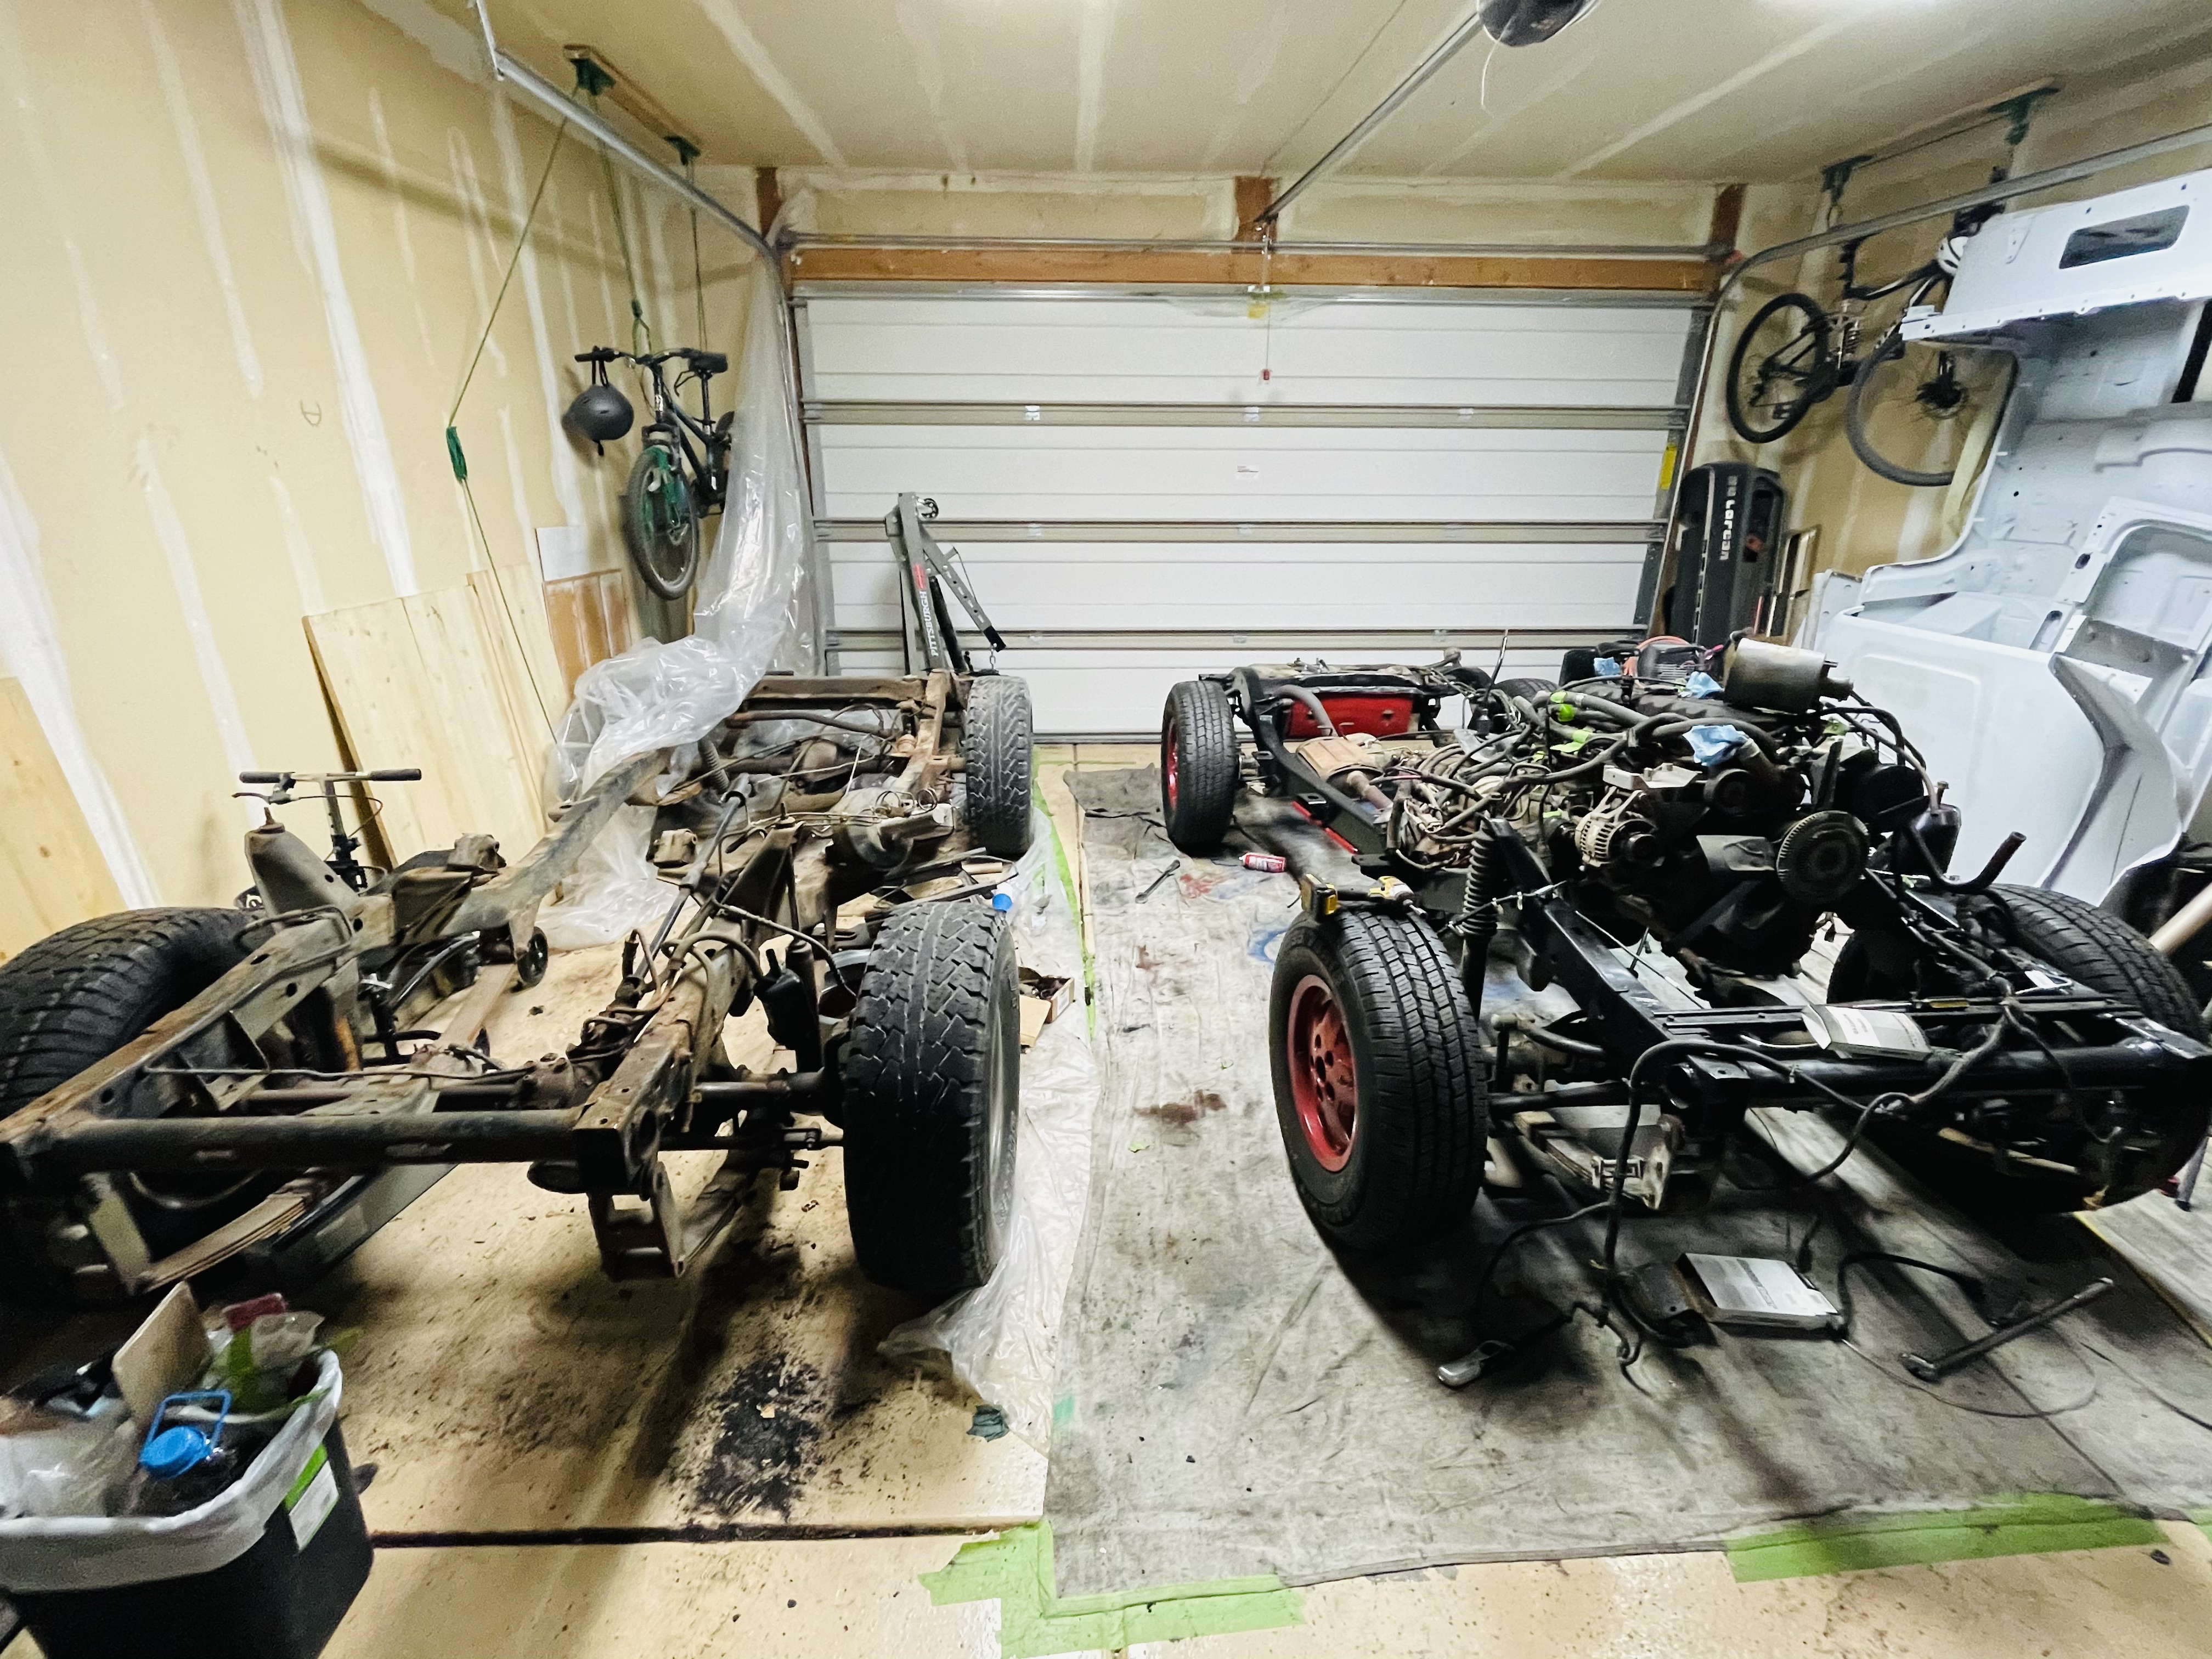
We moved the engine and transmission to the new frame (which was a 3 person job). You can get a great view of the old jeep (and how rusty it was) and the new jeep. I never knew how simple it was to work on cars until I took this apart. You can see the jeep tub leaning up against the wall (all primed). It was there quite a while. This was late February 2021

And here is the original frame picked clean like a zebra in the sahara. In hindsight, I should have kept the axles. The new ones I installed were different gear ratios, so I didn't have 4WD. Whenever I engaged 4WD, the tires would chirp because they were turning at different ratios. I had a mechanic replace the gears to 373 gear ratios (still not sure what that means) with Posi? in the rear. Maybe someone that knows that that means can explain it. I just know that 373 is better for driving on the freeway. March 2021

Ready to start painting. I rented a garage from a nice lady and transported all smaller parts to her garage. I covered everything in plastic from Harbor Freight and bought a paint suit, mask and goggles. I originally painted with the garage door mostly closed (to avoid bugs and leaves), but that left my light headed. So I had to buy a few fans for ventilation. If I ever paint again, I'm going to find an actual paint booth with ventilation. I only primed the parts in this garage, but I got a pretty good handle on using the paint gun. I used a HVLP paint gun from Harbor Freight that cost $14.99. I paid the extra $3 for the warranty and would just exchange used paint guns for new ones. I'm not sure if that's the honest way to do it, but I ended up owning 4 paint guns (one for primer, one for red, one for sand beige and one for clear coat)...so they did sell my 4x as many guns as I had originally planned.
The worst paint I used was POR-15. It's a black, tar-like paint that I used to coat the undercarriage of the tub. It seals out rust and inhibits current rust. I was sneezing black mucus for a week afterward even with a face mask. October 2020 - May 2021

I used two coat paint (which I guess means there is a primer, the paint, then a clear coat on top...but it's my first time, so what do I know). This is the official color according to the Jurassic Park Motor Pool. It's a little lighter than the original Champagne color the Jeep was when I bought it.

And all the red on the Jeep is Ford Performance Red (sorta funny since it's not a Ford). I only needed a pint of Red to do all the stripes and windshield. I do need to go back and re-paint the rims to match...but that's a future me problem.

Starting to put everything back together. It was at this point that I realized I hadn't labeled any of the wires, so there was a bit of trial and error here. The orange and green wires screwed to the top of the tub were apparently very important (the Jeep wouldn't start without them grounded). March 2021

Do you like my setup. I stretched out metal coat hangers and hung them from the ceiling in my garage. Then I hung parts from them and painted them with sand beige. I would have to cycle out parts because I didn't have enough room to hang all the pieces. This was a test in scheduling. I had to prime the tub the previous year so I could store it, then move all the parts from the old frame to the new frame and then sell the old frame (or junk it) to make room for my fancy paint booth to start painting the various pieces. As one side of the garage would free up, I could start on each new stage. My wife hasn't parked her car in our garage since she bought it. April 2021

The sacred texts. This is from the Jurassic Park Motor Pool website. It really helped in laying out the tape lines and measuring where to place the numbers.

This was nerve-wracking to apply the stripes. I must have gone back and forth between both sides remeasuring the angles a dozen times. The green tape is just standard painters tape. The orange tape is "line-tape" I picked up from the auto paint store. It's really just vinyl tape, but it leaves crisp lines. I masked the red, then covered everything beige in plastic to avoid overspray. Red is a lot easier to apply because you can see it. Applying sand beige over gray primer in dim lighting is very difficult to see the coverage.

This was one of my biggest issues. I put the hood up to spray and it left a mark right in the middle of the hood. I had to sand down the paint and repaint it a second time. Next time, I'm not going to do this. Also, I should have removed the hood hinges before I painted...more about that later.

Almost done. The paint and clear coat is on and this was one last clear coat. I still had to assemble the dashboard, add the roll bars and soft top and the decals, but this was when I actually started to see the fruition of all the hard work.

And we are all painted red. Adding the red is what made this jeep start to come together. Before that, it looked like a lighter version of the original color. But the red is the defining color. This was one of the funnest paint days because I could really see the progress. I couldn't wait to for the paint to dry so I could remove the stencils. Late April 2021
Here's the money shot! This was so satisfying to finally have a permanent fixture for this project.

And this is why you remove the hinges when painting the hood. I had to re-mask the red and do a quick coat to cover the holes. A lot of people will paint with the hinges on or the doors on or with the fenders on...but I knew I might take these off at some point and didn't want to fool around with lining everything up again. It's the little nooks and crannies that really get you.

Here's the tub side of the hinges. Since the hinges were always on it, I didn't even prime it or add the sand beige to it. I was able to fix this by taping all around it, then adding plastic, and using a spray can of primer. After that dried, I painted it red. Then after that dried, I removed the tape and plastic and applied another coat of clear coat here. It added another week of work for one very small section. April 2021

This was so satisfying! I have had some comments about the 88. It's in reference to Back to the Future - 88 mph. My next project is to restore a Delorean and I'm a big fan of the movies.

All painted and ready to roll. This was the day I put the decals on the doors. My buddy that helped drive it back from Minnesota showed up and I let him put one of the decals on. Also, there is no windshield or wipers at this point. I had to drive to Safelite to have them install the windshield. They didn't have all the seals in stock, so I had to order some...which delayed it a bit.

That looks super clean and fancy. I picked up the decals from 401graphics. I also have a rear mirror parking pass from them...but I can't put it on until the windshield is installed. This was July 10, 2021...2 years since I found the Jeep on Facebook Marketplace.
I have the song "Journey to the Island" on repeat for shows and can play it for several hours without draining the battery. I now have a windshield, new seats and a soft top that doesn't leak. The fog lights in the front of the jeep were super expensive because they are not made anymore. I am still missing a Ramsey Winch...but those are about $1000 so that's a future me problem. This was taken at the Crossroads Fan Festival. My son and I had just come out of a movie and the organizer chased us down to ask if we could bring the Jeep to the festival. I love parking on sidewalks, so this was a win-win for me.
Fun story - about an hour before this video was taken, the front transaxle (the axle that connects the 4WD to the front axle) fell off and was spinning on the transmission skid (red part in the middle of the frame). So I crawled under the Jeep and removed the transaxle completely. While I did this, my daughter sat in the passenger seat on her phone waiting patiently. She saw me crawl under the Jeep with larger and larger wrenches until I emerged triumphant. I told her we could go and I held up the transaxle and mentioned that I didn't think we need this large part. She was very concerned, but I told her we had 3 other axles, so it was fine. That's why I love my Jeep.
All done after quite a bit of work. I have the same year, make, model, and trim as the movie. I even have the same soft top with the square door panels. My kids love that we drive around in this Jeep and my son learned how to drive stick shift in it. I learned how to work on body panels, how to paint, how to deal with rust and broken bolts and what to do when a rag is sucked into the engine because I forgot to remove it. This was such a fun project to work on. Thanks for joining me on my journey.
#jurassic_park #jurassicparkjeep #jeeplife

Michelle tax. She brought us home safely from MN. My buddy packed her as a surprise for me and stuck her on the dash as soon as I had paid for the Jeep. #diy_projects
Krashtestdummy
WhoToldYouLifeWasFair
Must go faster... MUST GO FASTER!
thomn8r
@op - check out https://www.blipshift.com/products/y-rex?mc_cid=e9cc08db0d
nsaspyingonuranus
My daily is a '95 YJ w/ 4 angry squirrels, and I salute your hard work.
Mirecourt
But, most importantly, it faster than a T-Rex?
funkystay
You will have dinosaurs on your dinosaur tour, right?
TheDeathscythe
Nice! Carefull with the ID-tag. Had that in my car as well but the sun was starting bleach it.
harpti
This is awesome!!! Also, #lightsoverlockers
FrogDNA
zeacorzeppelin10
Beautiful.
RonnieKielbasa
beastiebunny
Objects in the mirror are closer than they appear.
StarscreamAndHutch
All around awesome!
TAYLORSWlFT
Gonna have to knock off a point because it's a 93 instead of a 92, but daaaaaaaaaaamn that's awesome, congrats. great work.
joevsthevolcano
You’re right, they were ‘92 Jeeps, but the movie came out in ‘93. I choose to believe John Hammond crossed model years…spared no expense.
Jamnew60
What, no TRex on the back!
joevsthevolcano
We have an inflatable Trex costume for Halloween
Homietwelve
I don't see an interactive CD-ROM. But I'll upvote anyway
joevsthevolcano
The interactive cd-rom is in the explorers. That’s be a fun project to do!
d3ltabrav00
Instantly recognized the yellow fence, hope you got some apple pie and taffy! Love the jeep!
joevsthevolcano
Sure did
buffetbear
Spared no expense
TheOblibop
Well I hope you're bloody happy with yourself. Because I am - great job.
theoriginalgiga
*dinosaur sounds of approval*
SupposablyPersnickity
Wow! You’re such a nerd and I love it.
RedShotRonin
Fantastic! And worth all the hard work, you’ll get random people taking pictures of your parked car at grocery stores for years to come.
JustHereForTheMemes0321
Greatest movie of all time
muzzmuzzle
That's amazing! I'm very envious!
Sugarbritches21
@donutolympian this made me think of you
DonutOlympian
I'd love to be able to do a full restoration of mine
ToSisPoS
Does it have CD-Rom?!
joevsthevolcano
CarPlay…spared no expense.
ToSisPoS
You spent so long wondering if you can. You should’ve stopped to think if you should.
Rapturesfall
Do you live in Oregon? I see a Jurassic Park Jeep around here pretty often!
joevsthevolcano
Not Oregon, but there are dozens of us...dozens.
FloofBucket
There's one in Brigjton UK too!
Rapturesfall
Apparently! There's also a Mystery Machine and a Back to the Future DeLorean around here as well
LetheTheArtificer
@OP Guessing the '88' was birthyear I hope, right?
joevsthevolcano
In reference to 88 mph from back to the future
ShiftingPattern
88 is a Nazi dog whistle of sorts, something they put out there to advertise to each other.
LetheTheArtificer
I can dig it! Much better than the unsavory Nazi side of numerology. Kinda want to see the Ecto-1 license plate but 1/2
LetheTheArtificer
then we're approaching Ready Player One reference levels. 2/2