RobinLewis
86621
1327
46

This is an old hatchet I've had for a few years. It's seen a lot of action and it's looking a bit tired. It's time to show it some love.
Watch the video here: https://youtu.be/wCarg9bBbdg

The handle is made of rubber. It felt great when I bought it but it's showing it's wear now.

The steel has a think coat of rust on it so that'll need to be removed.

To remove the handle I used a combination of a heat gun and a chisel.

The heat gun softened the rubber just enough so that I could easily slide the chisel through it.

The smaller pieces that were embedded in the steel had to be removed with a wire brush. This was also a good way to clean the steel in preparation for the new handle.

To lock the new handle in place I was going to use a combination of epoxy and dowels. I drilled 3 holes in the handles to accept the dowels.

The holes were drilled using an 8mm bit.

Next I started cleaning up the head of the hatchet. I started with a wire brush...

Then moved on the belt sander. The 36 grit belt worked great for removing the bulk of the rust and restoring the edge.

After that it was onto a 120 grit belt...

And finally 600 grit paper to and a bit of class. 600 grit won't bring it up to a shine but it has a "brushed" looked.

The handle was made out of a hardwood. I think this is Jarrah (an Australian hardwood) but I can't be sure.

I cut 9 pieces of wood roughly 35mm x 20mm x 20mm.

To make sure the pieces were flat and ready for glue I used 120 grit on the belt.
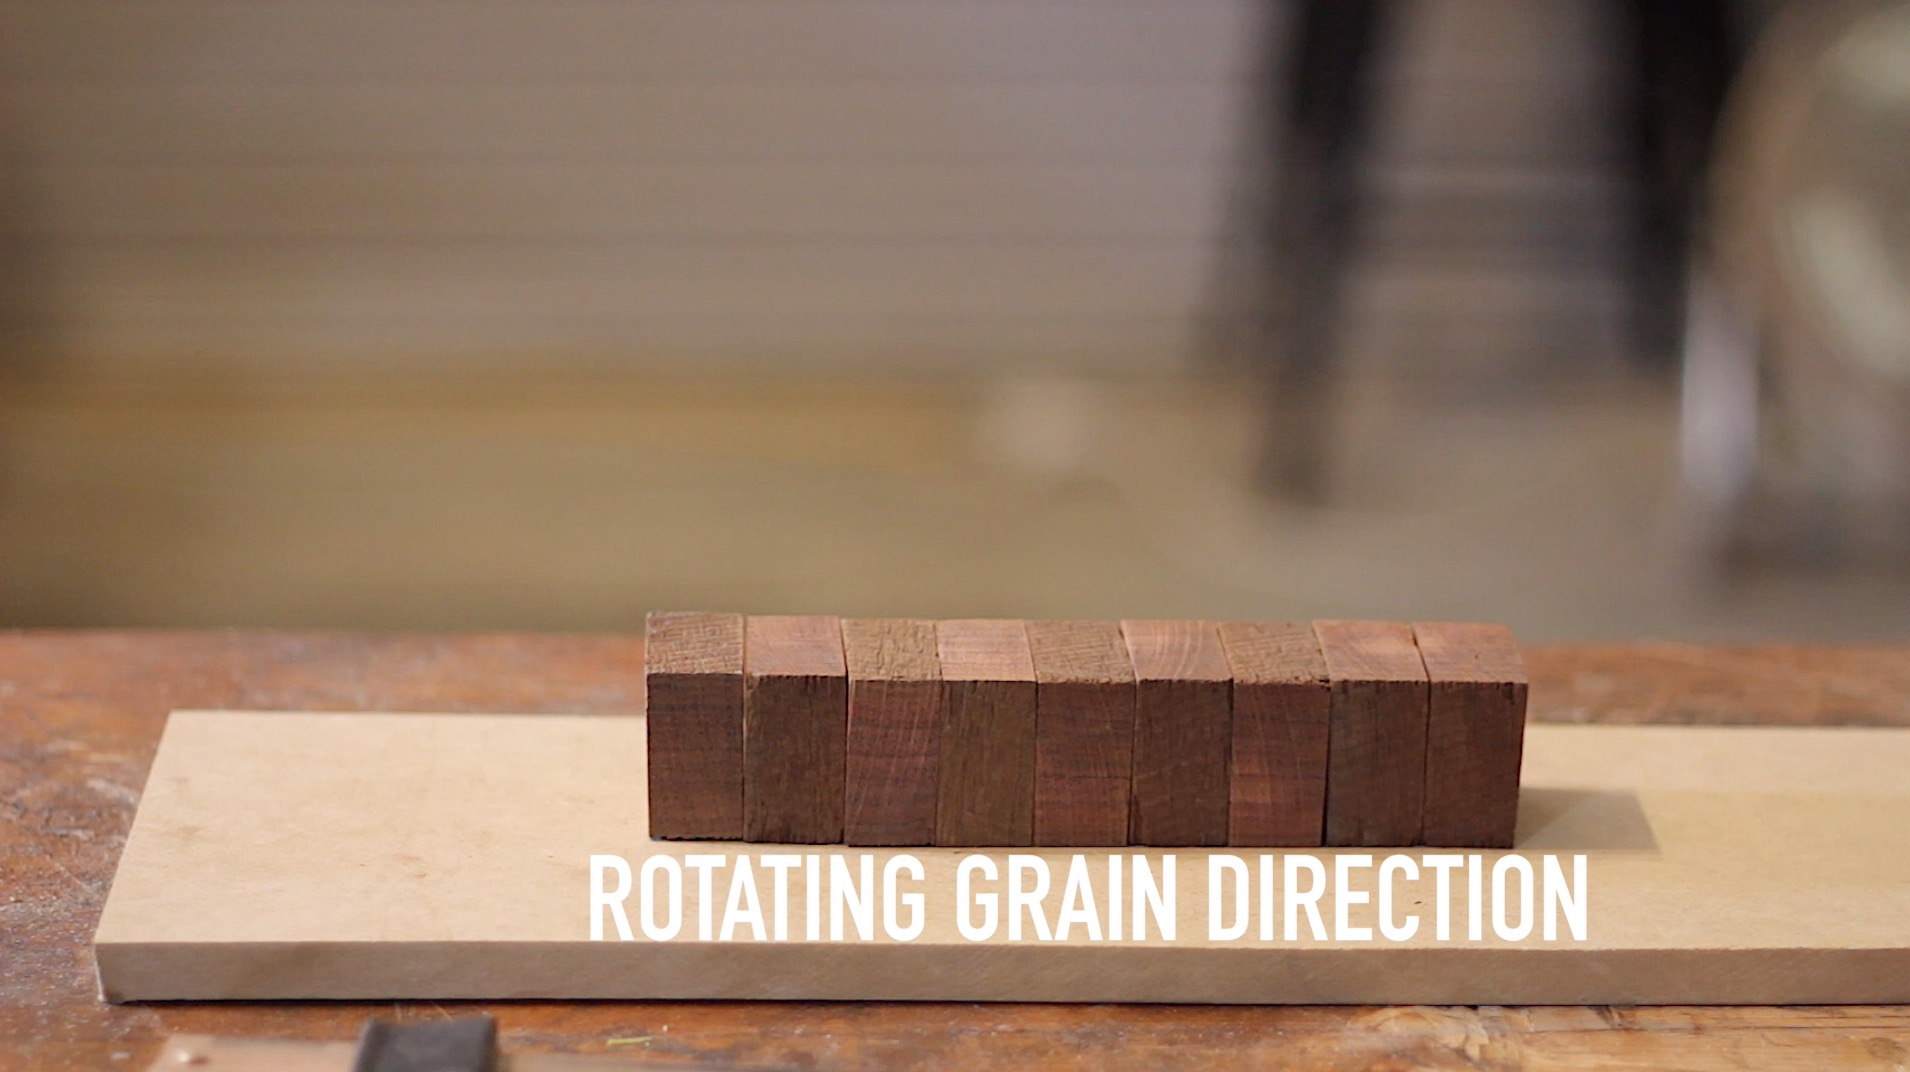
The specific look I was going for with this handle required the grain change direction. This is how plywood is made. You can see the striped effect here.

I added glue to each piece...

And clamped them together. The levels on either side were just to stop the pieces of wood from sliding around.


After the glue had dried I marked a centre line through the new piece, and started cutting.


This left me with 2, bookmatched pieces.

Each cut side was flattened on a block with sandpaper.

The handle was used to trace the area that needed to be cut out on each side of the handle.

To remove the wood I used a router. This cut will never been seen so I did it free hand, but you want to make the fit fairly snug.

Then I applied a liberal amount of epoxy into one side of the handle. The epoxy does the bulk of the work so you want to make sure that it gets into every crack.

I added a few clamps and waited 24 hours before removing them.

Then I used the same 8mm drill bit to drill the the handle and the wood.

This exposed the hole on the wood side of the handle.

Then I could route out the other half of the handle...

Add more glue to the second half of the handle...

And clamp it all together.

Where the holes were made on the first half of the handle, I used them as a guide to drill straight through the entire piece. This meant all the holes lined up.

I added some 8mm dowels through the handle with epoxy as glue. I could've used wood glue but that doesn't stick to steel and I wanted the dowel to be locked into both the wood and steel.

The excess of the dowels was removed...
And the surface was sanded smooth.
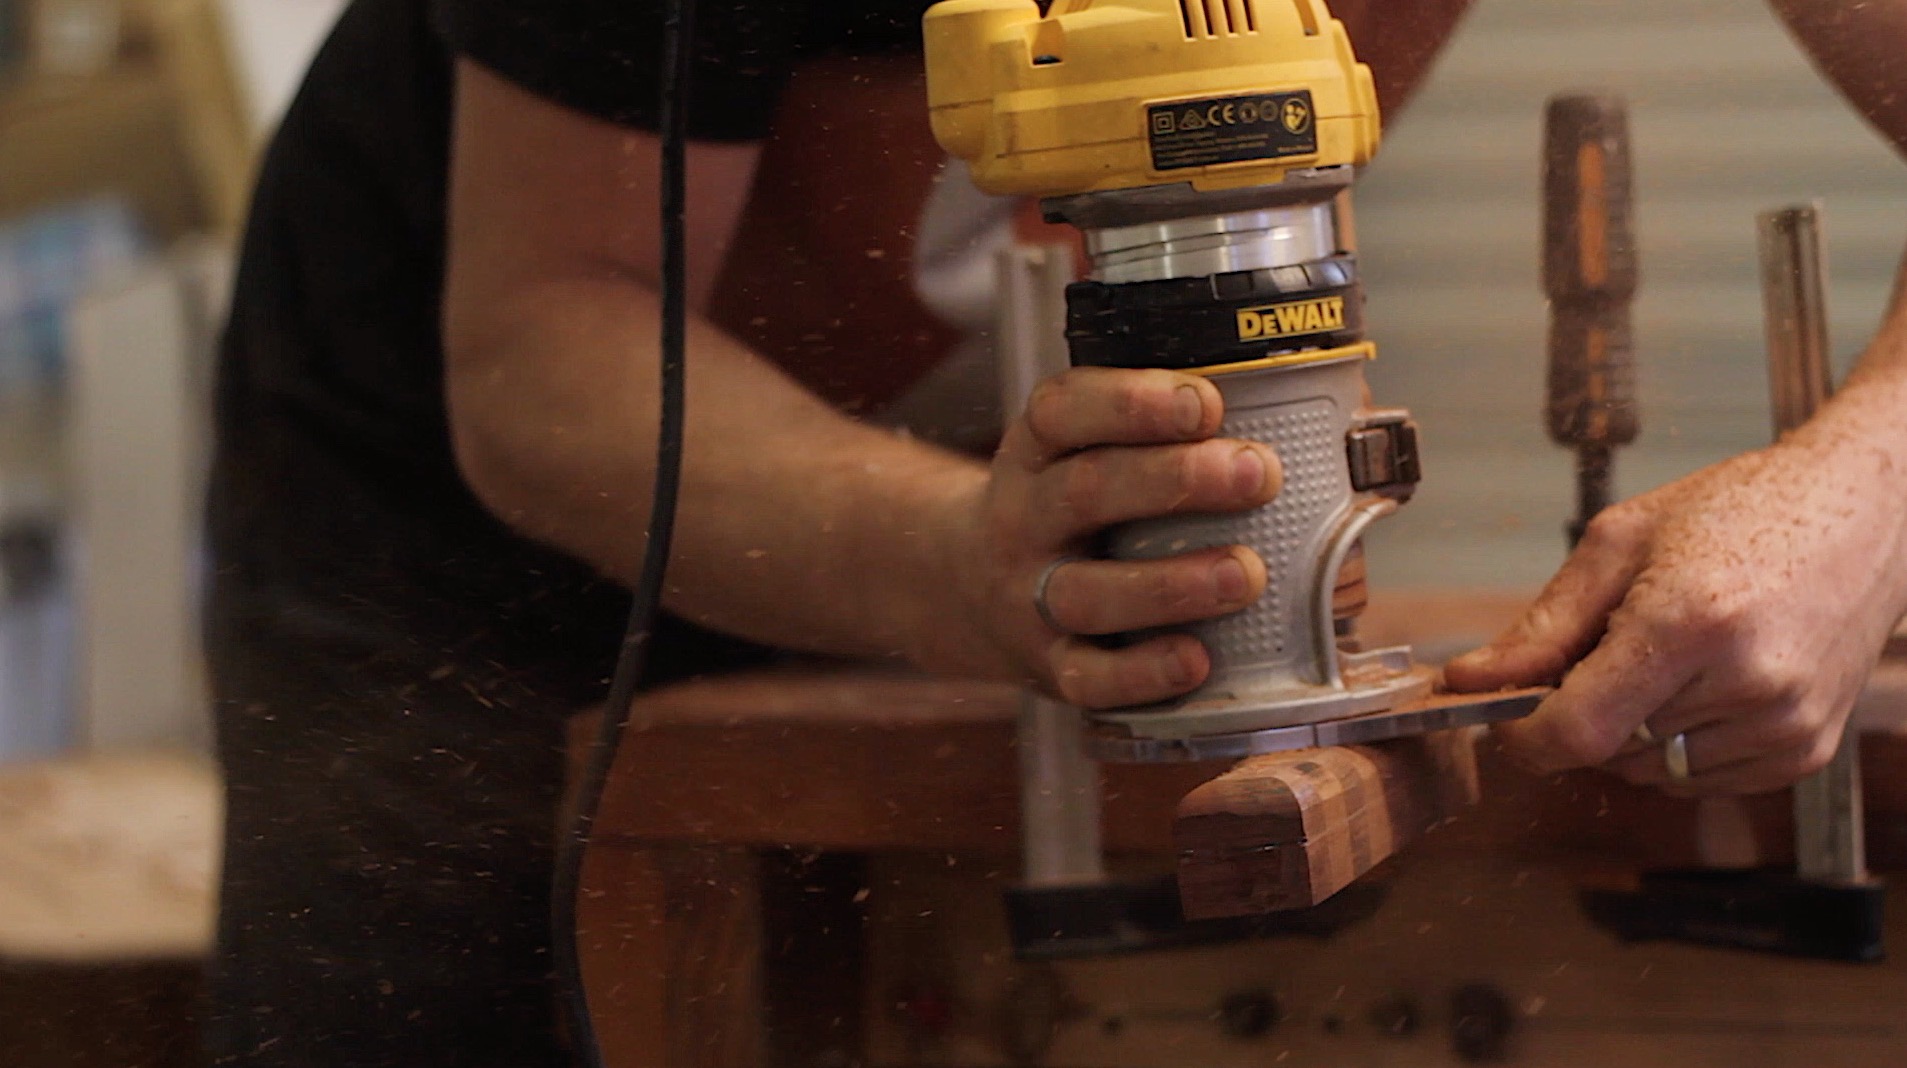
To give the handle a rounded shape I used a large round over bit on my route.

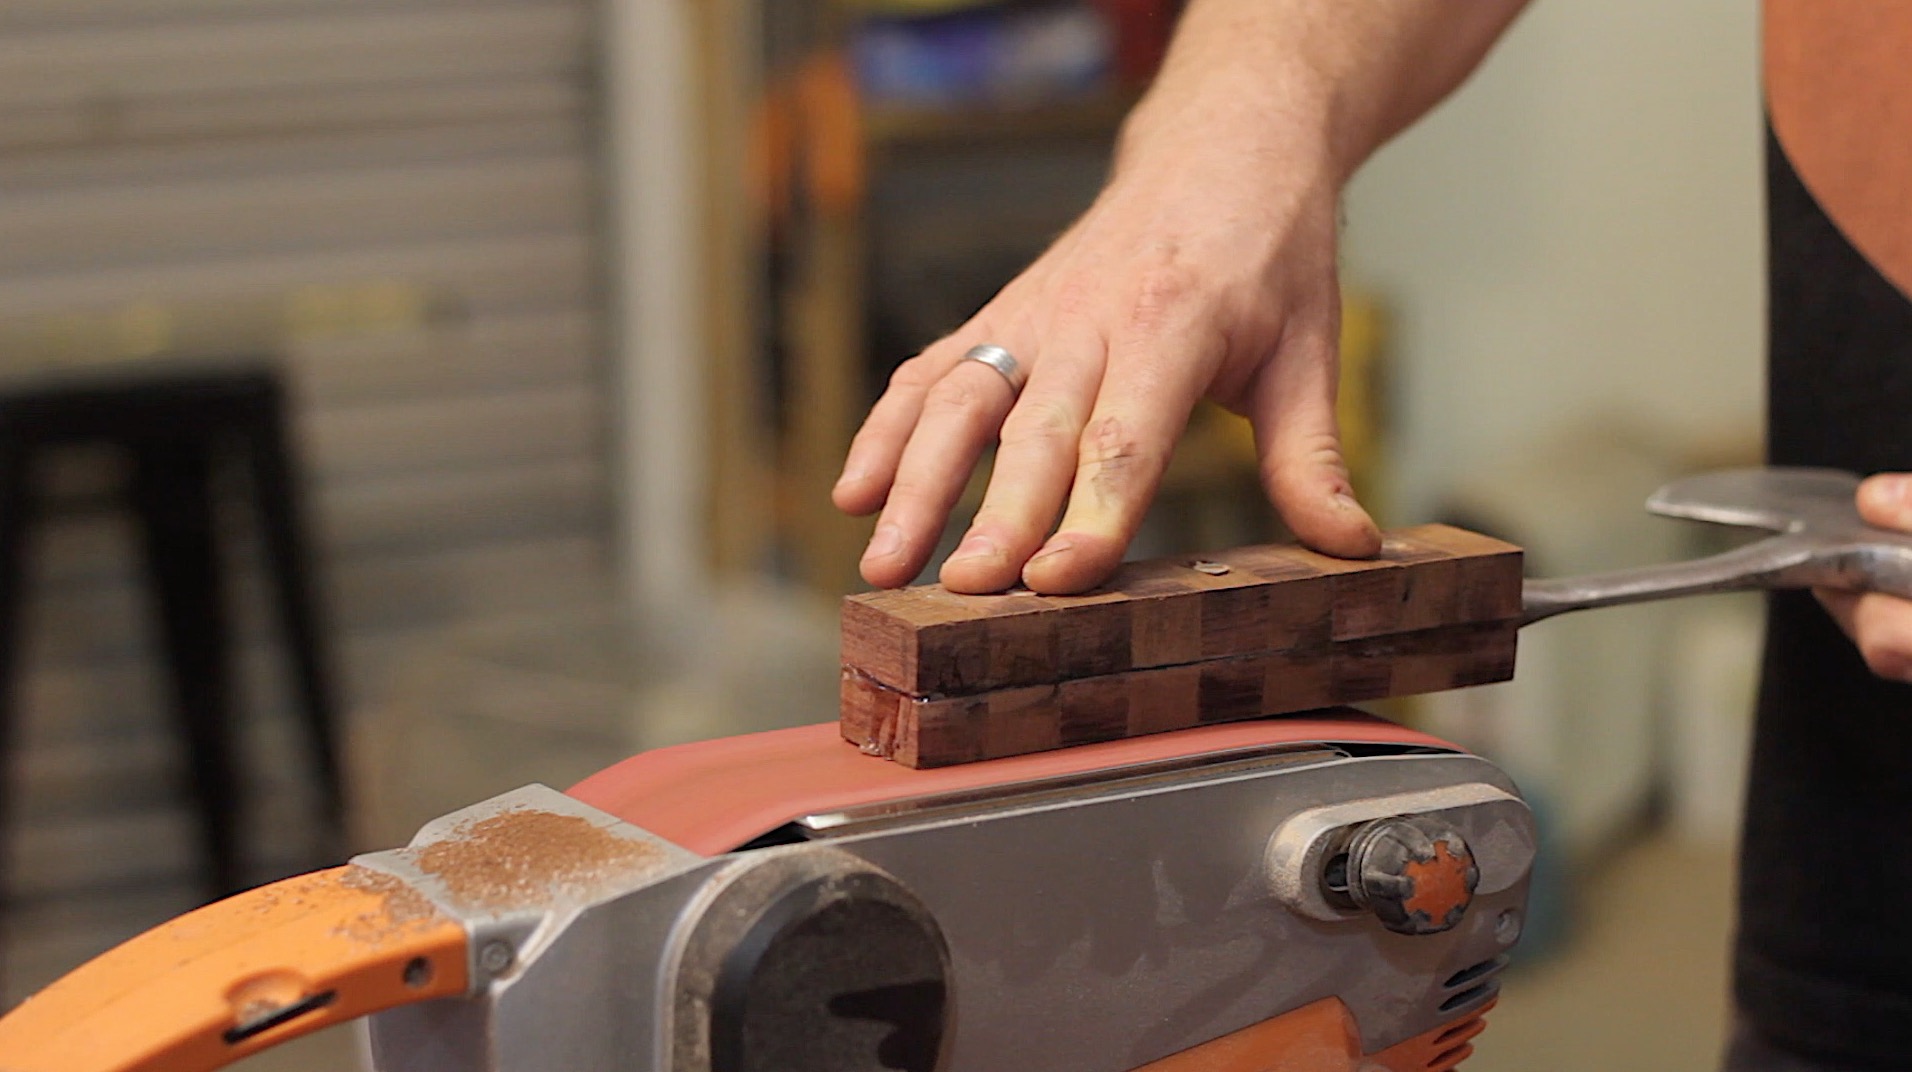
To shape the handle I went back to the belt sander. As I went I worked out different methods to create repeatable shapes. Here I'm sliding the base of the handle along the table while moving the top of the handle down. As I got to the steel I would stop. This process could be repeated on all 4 sides.

To smooth the curve I cut some sandpaper, folded it over, and used it like a belt, moving it side to side over the handle.

For objects that are going to be held or used aggressively I like to use linseed oil. The idea behind it is no amount of polyurethane or paint will stand up to a handle like this, so an oil is more practical. Yes, the oil needs to be applied occasionally, but reapplying oil is extremely easy.

I wiped on the linseed oil using a rag. I gave the handle 2 coats.


IHonestlyCantCommitToAUsername
Nice work, but would definitely recommend that you use gloves when dealing with epoxy
auserwithaname
Beautiful! As a hobbiest knife maker this was like one of those calming videos ????
STGxDante
Ty for the penetration tactics. Here I thought cloroform was the best penetrant.
corgimas
Diresta taught you well. Very nice
Lordvice
Nice work OP, a labor of love for sure.
ldavinci
you sir are an able johnny
NotSureIfItWasAFart
I love seeing old tools revitalized. Well done @op.
RobinLewis
Thanks very much
thejones86
Let us see it chop shit!
ICleanUpDirtyDIrt
The handle looks top notch and makes the head look crappy. Did you consider finger ribs on the handle?
Sinnerman99
I will have to remember to mix linseed oil with turpentine for deeper penetration although I imagine the turpentine might burn a little.
RobinLewis
Haha
Tr3vayne
"Mixing linseed oil with mineral turpentine improves penetration" ( ͡° ͜ʖ ͡°)
SlippedInPeepeeAtTheCostco
Or? Or?..... bear with me on this..... he could have bought a new one.
CraftedLine
Those rings are gayer than a $3 bill!
Rossco311
Burghguy
Now, if you replace the head, is it still the same hatchet?
MerToo
Aww Granddad you always say that
Burghguy
And I'll keep saying it until you youngins get off my lawn. And take yer dang fidget spinners with ya!
Shaggieh
the old rubber handle would have been more comfortable. good job on sharpening though.
bb2b
Finished product first.
PickleScratcher
'Hatchet Restoration' sounds like a History Channel reality show where aging Juggalos take on fixer uppers.
Vaanhalen
Rachet Restoration
Ringshadow
.. I'd watch that show.
ThatGirlWithTheStuff
Jesus fuck, @OP. Get a proper belt sander! A single clamp on a power tool is just ASKING for a flyback, followed by horrible disfigurement.
ThatGirlWithTheStuff
Get a cheap one from Harbor Freight or something. Seriously, anything is better than that.
TheSleeperMustAwaken
I always read these in my Ron Swanson voice.
fakir
so much effort for some upvotes ...
whereismydamnlighter
.
JCaf
I love these tool restorations... but in this instance, safety first. Buy a new hatchet.
Ross2075
You really handled that well
ImgeneralBennet
Lol
[deleted]
[deleted]
ScoopityPoop
Yeah, that joke really didn't cut it.
auserwithaname
Wood you stop with the puns?
Kieralynh
Ayooooo
ottotravel
Wow quite nice, I'm like oh $35.96, no problem. https://www.amazon.com/Estwing-E24A-14-Inch-Sportsmans-Leather/dp/B00BNQR4SG
idieeverytime
Hey that was my first ever hatchet!
SquanchingonImgur
Probably a better heat treat too.
distainv
Looks great but functionally i might say make the handle a bit thinner and flare the bottom a bit to let it bite into your hand better.
SLTWWS
.
MiracleWhoop
fistermatic5000
I would have used the router or even sander to make grips in it for my fingers to rest in. That wood looks slicker than snot.
Icommentoncomments
You bite my hand better
bunibama
Yeah, I can see a lot of accidental axe murders happening with this handle
YourTripIsShort
"Accidental"
PinkOmega34
Axeidental
somethingthathasntbeenused
You've been watching forged in fire
distainv
Nope but i have chucked a hammer across the room before!
SLTWWS
You've been bleeding recently.
WoodNinja
Please take your rings of before using power tools.
fistermatic5000
The injury is called "degloving" and it sounds as horrible as the actual injury looks.
MustardTiger1337
I like to think @op has a pony tail along with a tie on as well
RonaldDarko
Agreed better safe than sorry. I always take off wedding band and put in my watch pocket.
brobinson2001
Or, if it's culturally significant, silicone. Worked with a guy w/a titanium band that didn't deglove, it dragged his whole arm in.
rainrocket
If you're hand turning on a lathe, sure. For the tools used in this, very low risk.
missbelled
Low risk ain't no risk. Would you rather take off your ring yourself, or have it forcibly removed by the ER doctor along with your finger?
Alonsey
If you damage your finger enough, swelling becomes an issue regardless if rings get caught. Can't remove the ring, and no blood=dead finger.
Alonsey
Also, belt sander. Gets caught the wrong way, still tearing skin off. Horror story Shit exists, man. Happens easier than you think
severesocialanxiety
Not really related to rings but my mom was an ER nurse and when I was in 1st grade a man came into the ER with a severed finger because he
severesocialanxiety
Was using a power drill with a towel wrapped around his hand. The towel got caught in the drill and cut his finger off. She brought the
severesocialanxiety
Finger home for us kids to see. Yeah I know illegal but it couldn't be reattached.
Justiceforbradswife
I friend of mine got his 6 inch beard got in a drill ripped it right ouf... He has kept it alot shorter sense