tomrintjema
5655
30
2
Almost done

I have all 4 knobs but I forgot one when I took the final photo. I was lucky and my Grandmother had a suitable fabric to use for the speaker grille. Otherwise I would have ordered some from a place that deals with guitar amplifiers.
Before I started

This is what it looked like before I started.
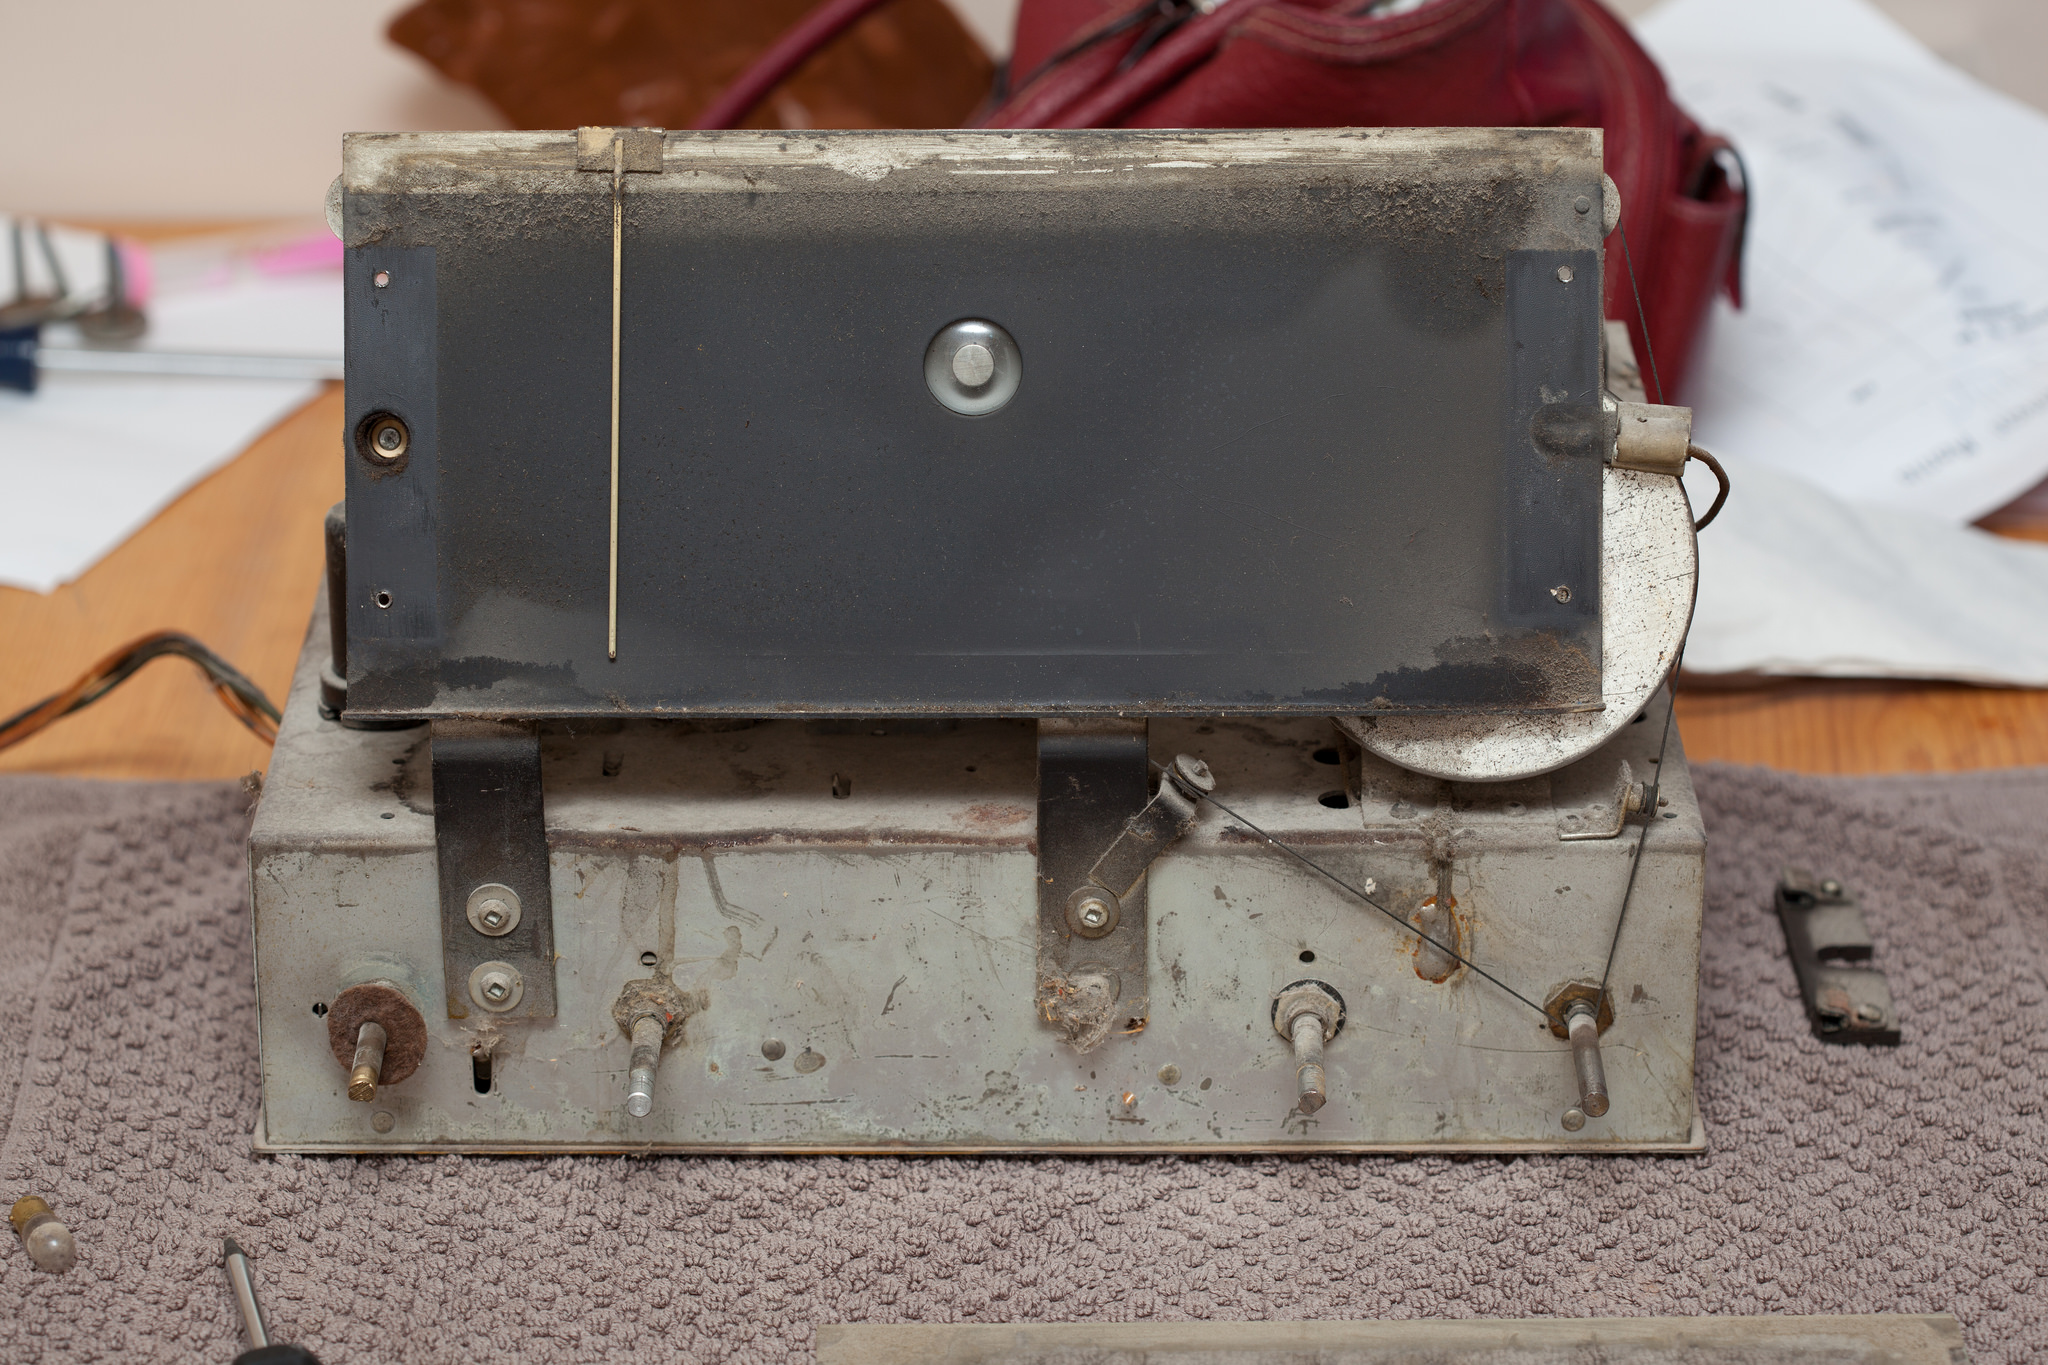
Radio guts

All of the electrics are in this box.
Radio tuner
The black plate behind the radio face. The needle for tuning and the 'magic eye' tube.
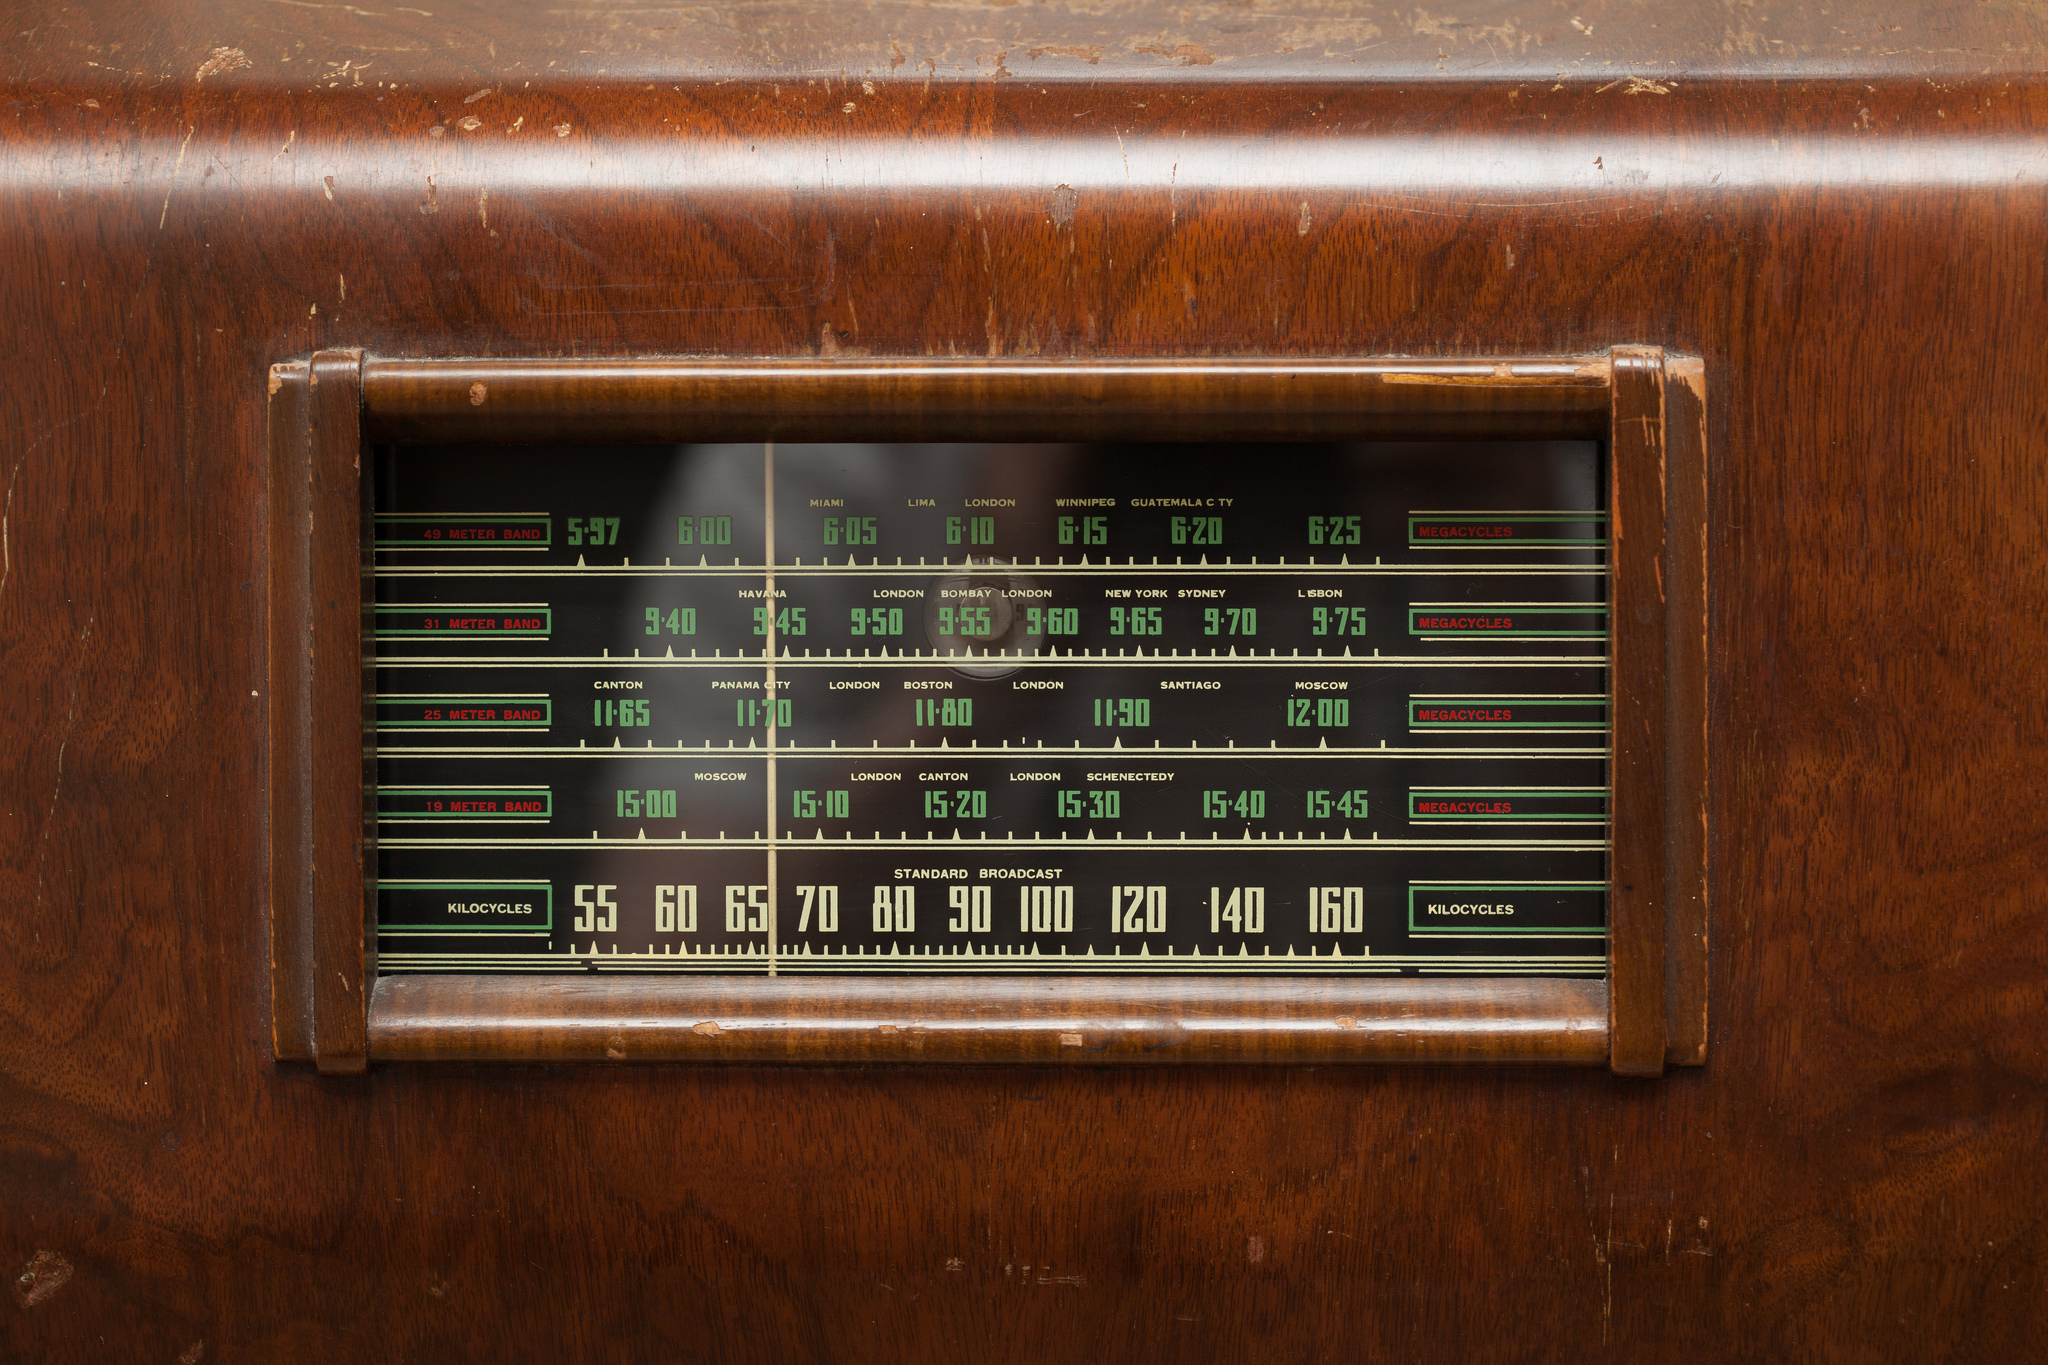
Tuner glass

This is an AM/Shortwave radio. Used to be you could pick up other cities I guess. Some people still broadcast on the shortwave bands and I can pick up some interesting things.
Radio tuner

All cleaned up and ready. I replaced the bulbs that light up the display. They were standard automotive bulbs.
Test fit
Before I refinished the cabinet I took a photo with the cleaned tuner in place.
Before closeup

Before I stared I took a photo of the tuner face.
Tubes

Dusty old tubes. I will bring them back to life. The horizontal tube is a 'magic eye' tuning tube that glows green on the face of the radio tuner and shows you how well you have the station tuned.
Tag

The cabinet was made by a furniture company.
WIP

Lots of sanding to do.
Point to point

Old electronics were made without printed circuit boards. They just had lugs for wires to be soldered to. Lots of the parts just hanging around in there. This wasn't too bad to work on but they also used to make TVs like this with 100 times more parts. Yikes.
New caps

Old capacitors dry up and stop working so I replaced them with new. I was lucky and found a wire diagram online. I was also able to read the values off the old caps. Modern stuff is probably a lot more accurate than what went into this when it was made.
Looking good!

Cabinet after I finished sanding and varnished it. I used a lot of sand paper and steel wool. I also used some paint stripper to clean out some of the hard to sand places. I just used a spray varnish to finish. The wood looks amazing in person.
It's alive!

Radio tuner face with new parts. Works great.
Back

The speakers used didn't have magnets, they used two opposing coils instead. This would be a real pain to replace.
Radio plate

Radio mfg pate.
Radio guts

Radio plate

They sure had fancy names for their radios.
Powered on

Radio turned on after I replaced enough stuff to be sure it was safe. It needed a couple of new tubes.
WIP

Sanding in progress. It was a lot of work.
Mostly sanded

I started with the paint remover after this. I wish I did that part first because after I had to wash the whole thing in paint thinner to get all the stains out of the freshly sanded wood. Oh well, live and learn.
Parts

Replacement capacitors.
Big cap

Pretty sure this was a replacement someone did before I got it. This is a 3 in one or something capacitor for the power supply.
Saft
That's really cool op! It's a very beautiful piece and restoration job!
dannywise
nicely done
beverly8
really cool find, and great restoration job!!
TheGirlWhoNamesEverythingGeorge
If only you could turn it on and hear what it used to play. :) Very nice job, OP
Jumpinjackieflash
Great work, you have saved a piece of history! Families used to gather around the radio like we do our laptops, to hear the news & dramas!