olvrjck
4373
121
5
Here it is...

It was built over the last three summers whilst I was back home from university. The guitar is a through-neck, based fairly roughly on a Les Paul Jr. I'm really pleased with how it turned out so I thought some of you might be interested in seeing a bit of a build log.

Started off with a block of cherry for the neck and two blocks of flamed sycamore for the front. The piece on the right had a much nicer flame so I cleaned it up and book-matched it. The second piece ended up as a bit of a test/practice block.

Block of cherry for the body.

Decided to start with the neck. Marked it all out with a neck angle of 3 degrees, leaving enough room for the angled headstock, then routed a slot for the truss rod.

I used a combination of a router and chisels to take off the bulk of the neck block and shape it ready to fit the body.

Routed some slots in the side of a pre-slotted rosewood fretboard to make some position markers at the 3rd, 7th, 12th and 17th frets.Glued some thin pieces of sycamore into the slots and scraped them flush to the fretboard.

Made an MDF template of the headstock shape and used a flush trim router bit to shape the headstock. I then glued on a rosewood veneer and used the flush trim bit again to shape the veneer to the headstock.

Inserted the truss rod and glued the fretboard to the neck block.

Drilled holes for the tuning pegs and the neck was very roughly done (apart from shaping).

To start the body I made an MDF template and screwed it to the back of the book-matched sycamore top. I then used the flush trim router bit to shape the sycamore to match the template.

Used the template to roughly mark the body shape onto the block of cherry then used a jigsaw to get rid of the bulk. I then routed out the electronic cavities.

Glued the sycamore top to the cherry block and used it as a template to shape the cherry to match. At this stage I also routed a channel along the back for the through-neck to sit in.

Used a rabbet bit to route a slot for the rosewood binding. Using a heat gun and a metal pipe I bent the binding to shape. Luckily only had a few cracks. The hardest bit by far was the sharp angle of the horn. For this I had to scrape the binding much thinner, then bend and laminate 3 pieces together and use a scarf joint to blend this corner with the rest of the binding.

Put screws into the sides of the old MDF template and used this to wrap the guitar in string to hold the binding in place as the glue dried.

Drilled the holes for the pots and the bridge posts then routed out the pickup cavity. Went for a single pickup mainly because I just love how single pup guitars look!

Body finished for now!

Fitted the neck and glued it in place.
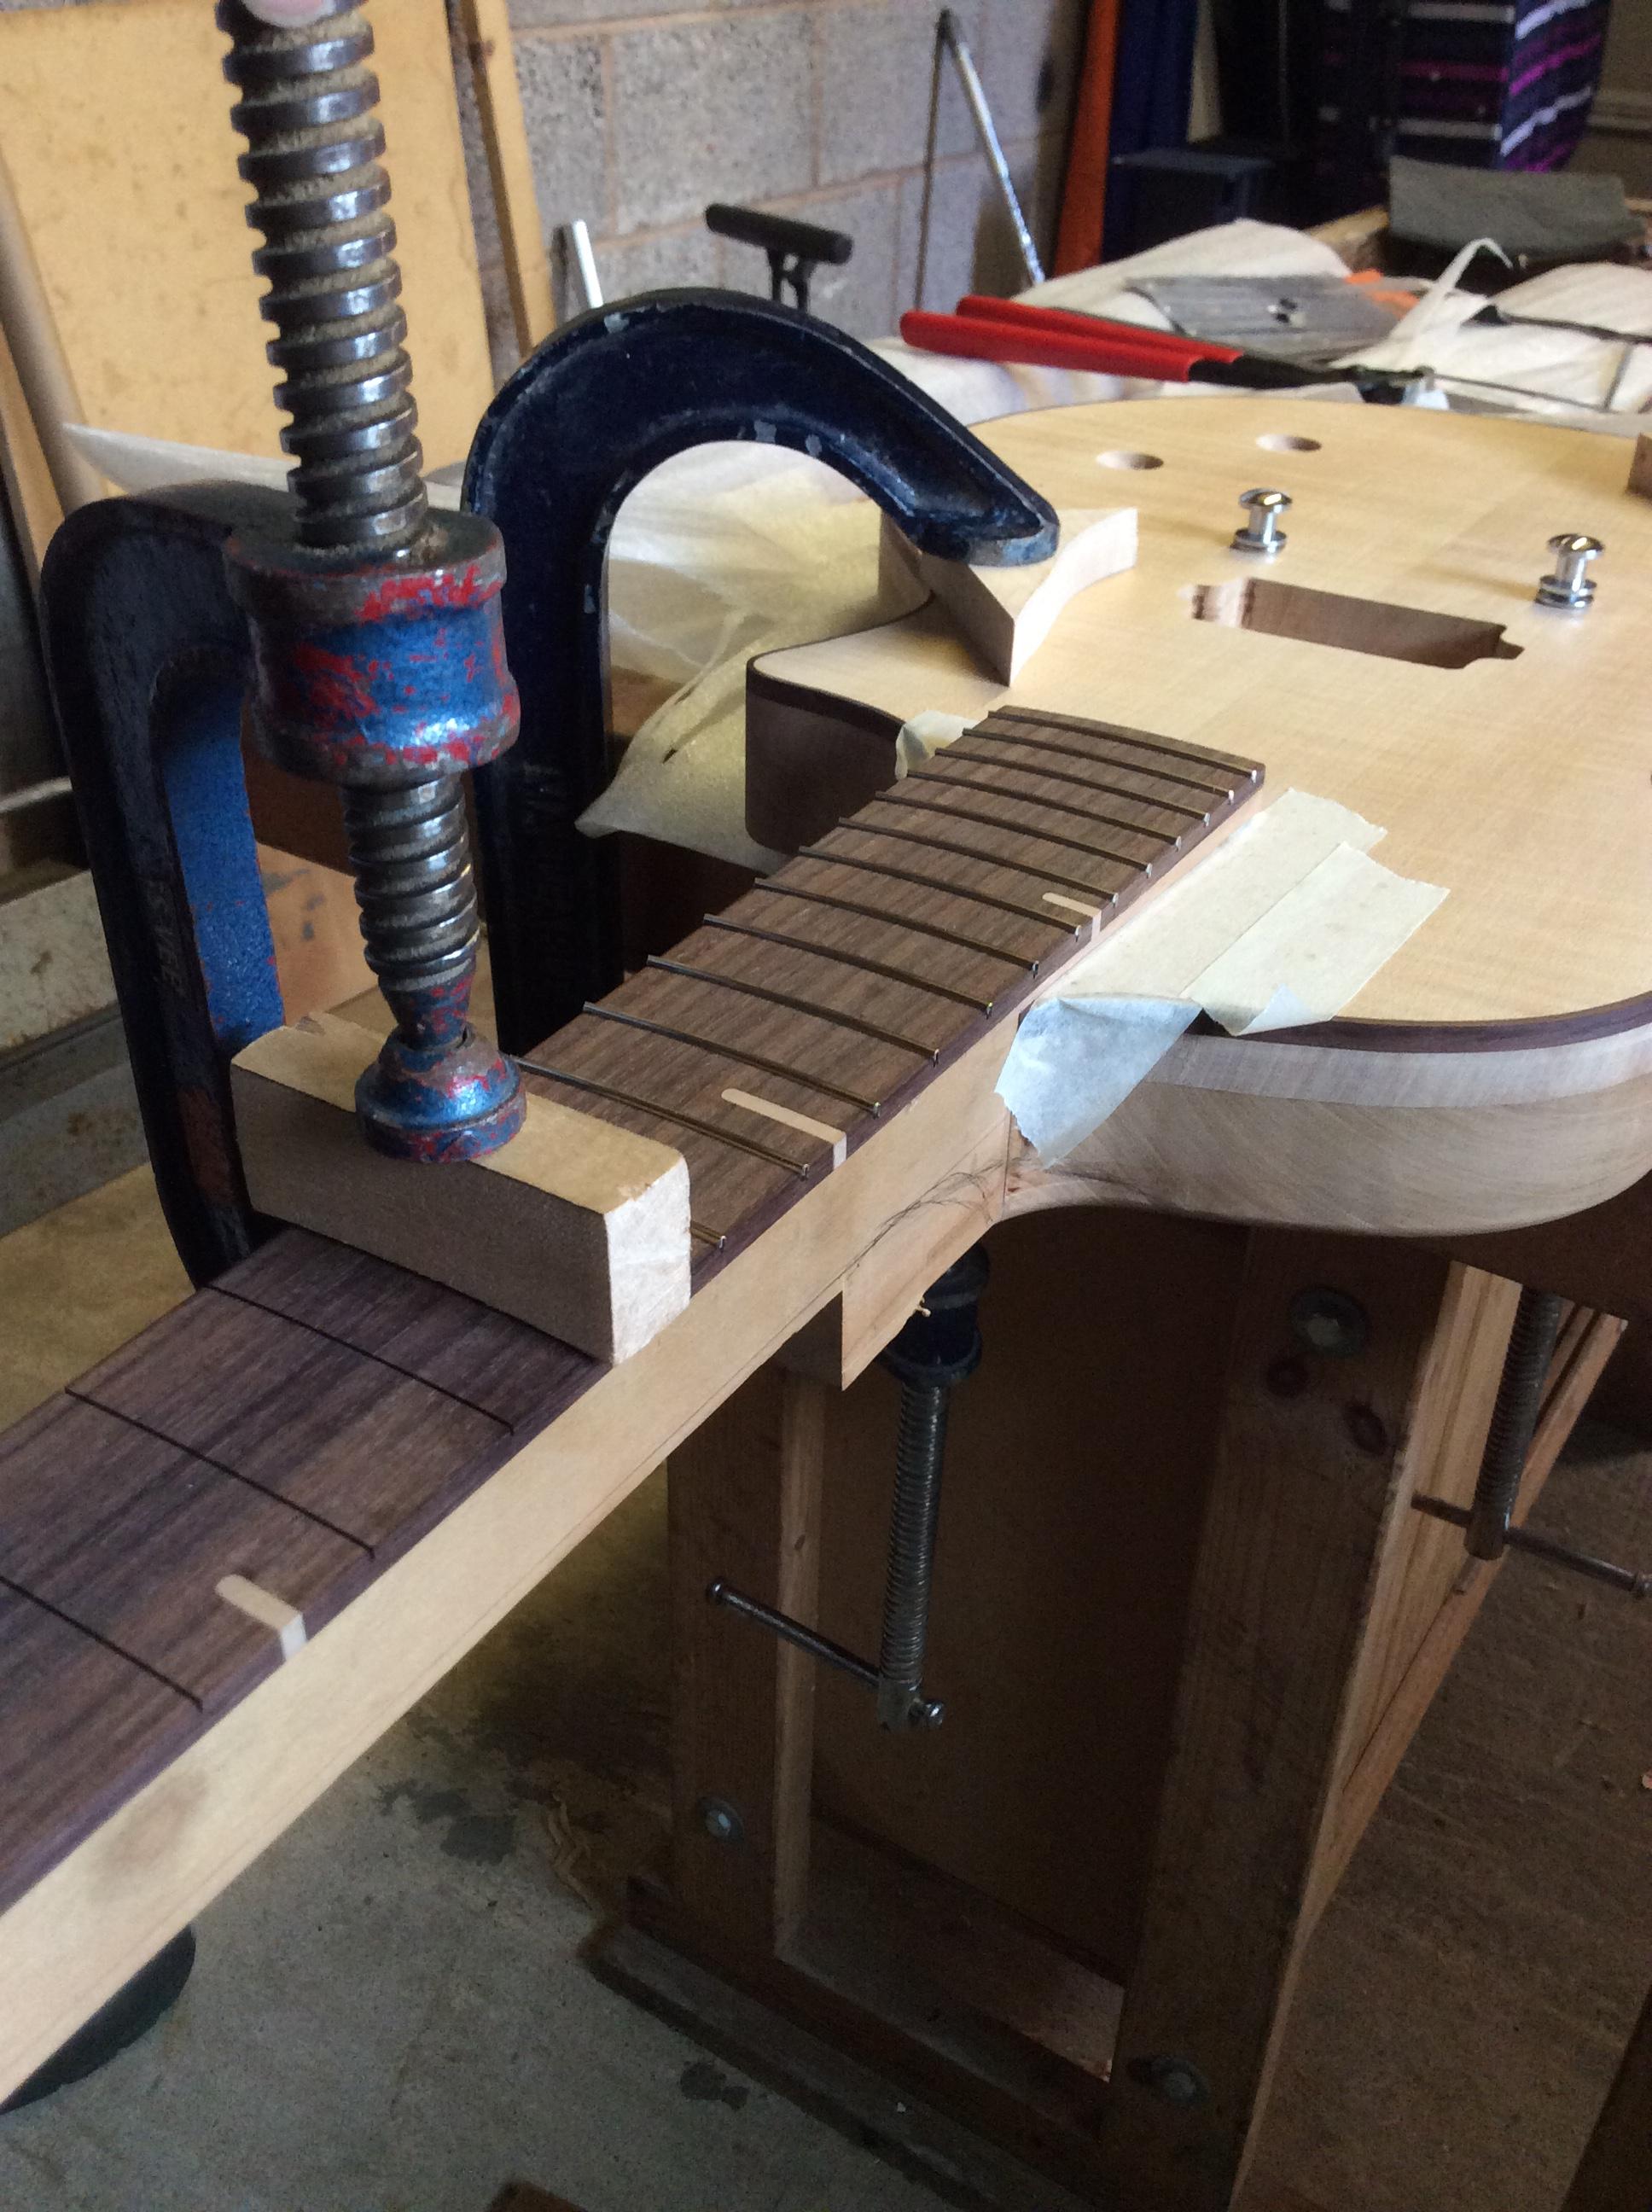
Bent and inserted the fret wire. I didn't glue the frets in, however a number of them started to lift slightly so I went along and glued in the worst offenders.

Frets all in and levelled!

Marking the centre point of the neck and starting to carve the cutaway. Definitely one of the longest jobs of the build!

Neck taking shape.

Shaping the headstock transition.

Made a rosewood pickup support. I wanted to use allen head bolts instead of screws wherever possible.

Truss rod cover shaped and fitted with another allen head bolt.

Fitting nuts and allen bolts for all of the tuners.

Nearly done, just varnishing to go! I didn't want to end up with a lacquered look so I used a thinned down satin varnish. Final few jobs were oiling the fretboard with linseed oil, installing all the hardware and sorting out all the wiring.

And here it is! For anyone wondering, I flipped the pickup 'upside down' to try and get the hot pole-piece side closer to the strings. Unfortunately the pickup is a little too far from the strings so I am going to experiment with a couple of different set ups, this being the first idea! Sounds pretty good to me!

Another view showing off the carve.

And finally the headstock. Spot the mistake!

After all that...some suspicious cat tax.
Let me know what you think to the build!
howyoudodis
That is really really really really good for a first guitar
Shrimm
Awesome!
IBrokeYourGString
Looks great. Congrats! That pickup direction looks all wrong to me, though, even if it was intentional.
CatPanda
You rock OP!!!
omisimo
I really like that sycamore part.
MareMortis
You sir are a man of fine craft.
GinSequitur
That's gorgeous. Well done. Hope it sounds as nice as it looks.
YouBannedMeForNothing
Submit a video to YT of you playing on it!
chazs527
very nicely done!
MostTriumphant
Awesome! I love the neck joint. No more annoying bumps all smooth and nice.
cronkey
How does it sound?
olvrjck
Pretty awesome! Much nicer than my old guitar. Will upload a video once im totally happy with the set up.
americablanco
Okay, I give up. What's the mistake?
EvilDragon
It seems to me that the very top of the headstock is not 100% symmetrical - slightly underbeveled left side on the image.
mrkraw
Bass player here... wanted to refinish a Yamaha BB400 once. Gave up. This is a bajillion times more impressive. Beautiful work!
Download16000WoodworkingPlans
.
SkullBuckles
It's beautiful.
CountSnarkula
Don't know what it sounds like but it looks like a million bucks. You should put your name on it somewhere. (not with a sharpie)
olvrjck
Thanks a lot! I've been toying with the idea of putting something on the headstock.
LastElf
Wood burning kit and sign it (Probably wanted to do that before the finishing coat though)
BigAZNMan
As a fellow luthier, that's sexy. Did you use a double expanding or standard single truss rod?
olvrjck
Just a standard single truss rod. Any massive advantage to the double expanding?
BigAZNMan
More even pressure on the neck, but more routing required. Some think they effect tone, but I don't notice a difference